How to use proxies
ScreenshotOne doesn’t include rotating residential proxies as part of the product, but you can plug in easily any external proxy provider you like, in three simple steps.
1. Sign up to a proxy provider
There are plenty of them, like Decodo, Bright Data, or Geonode.
You can find the Internet proxy providers that you prefer by price and quality. Choose and sign up for the proxy provider.
Not because it is the best one or the cheapest one, but in this guide, I will use Decodo as an example.
2. Get the proxy URL
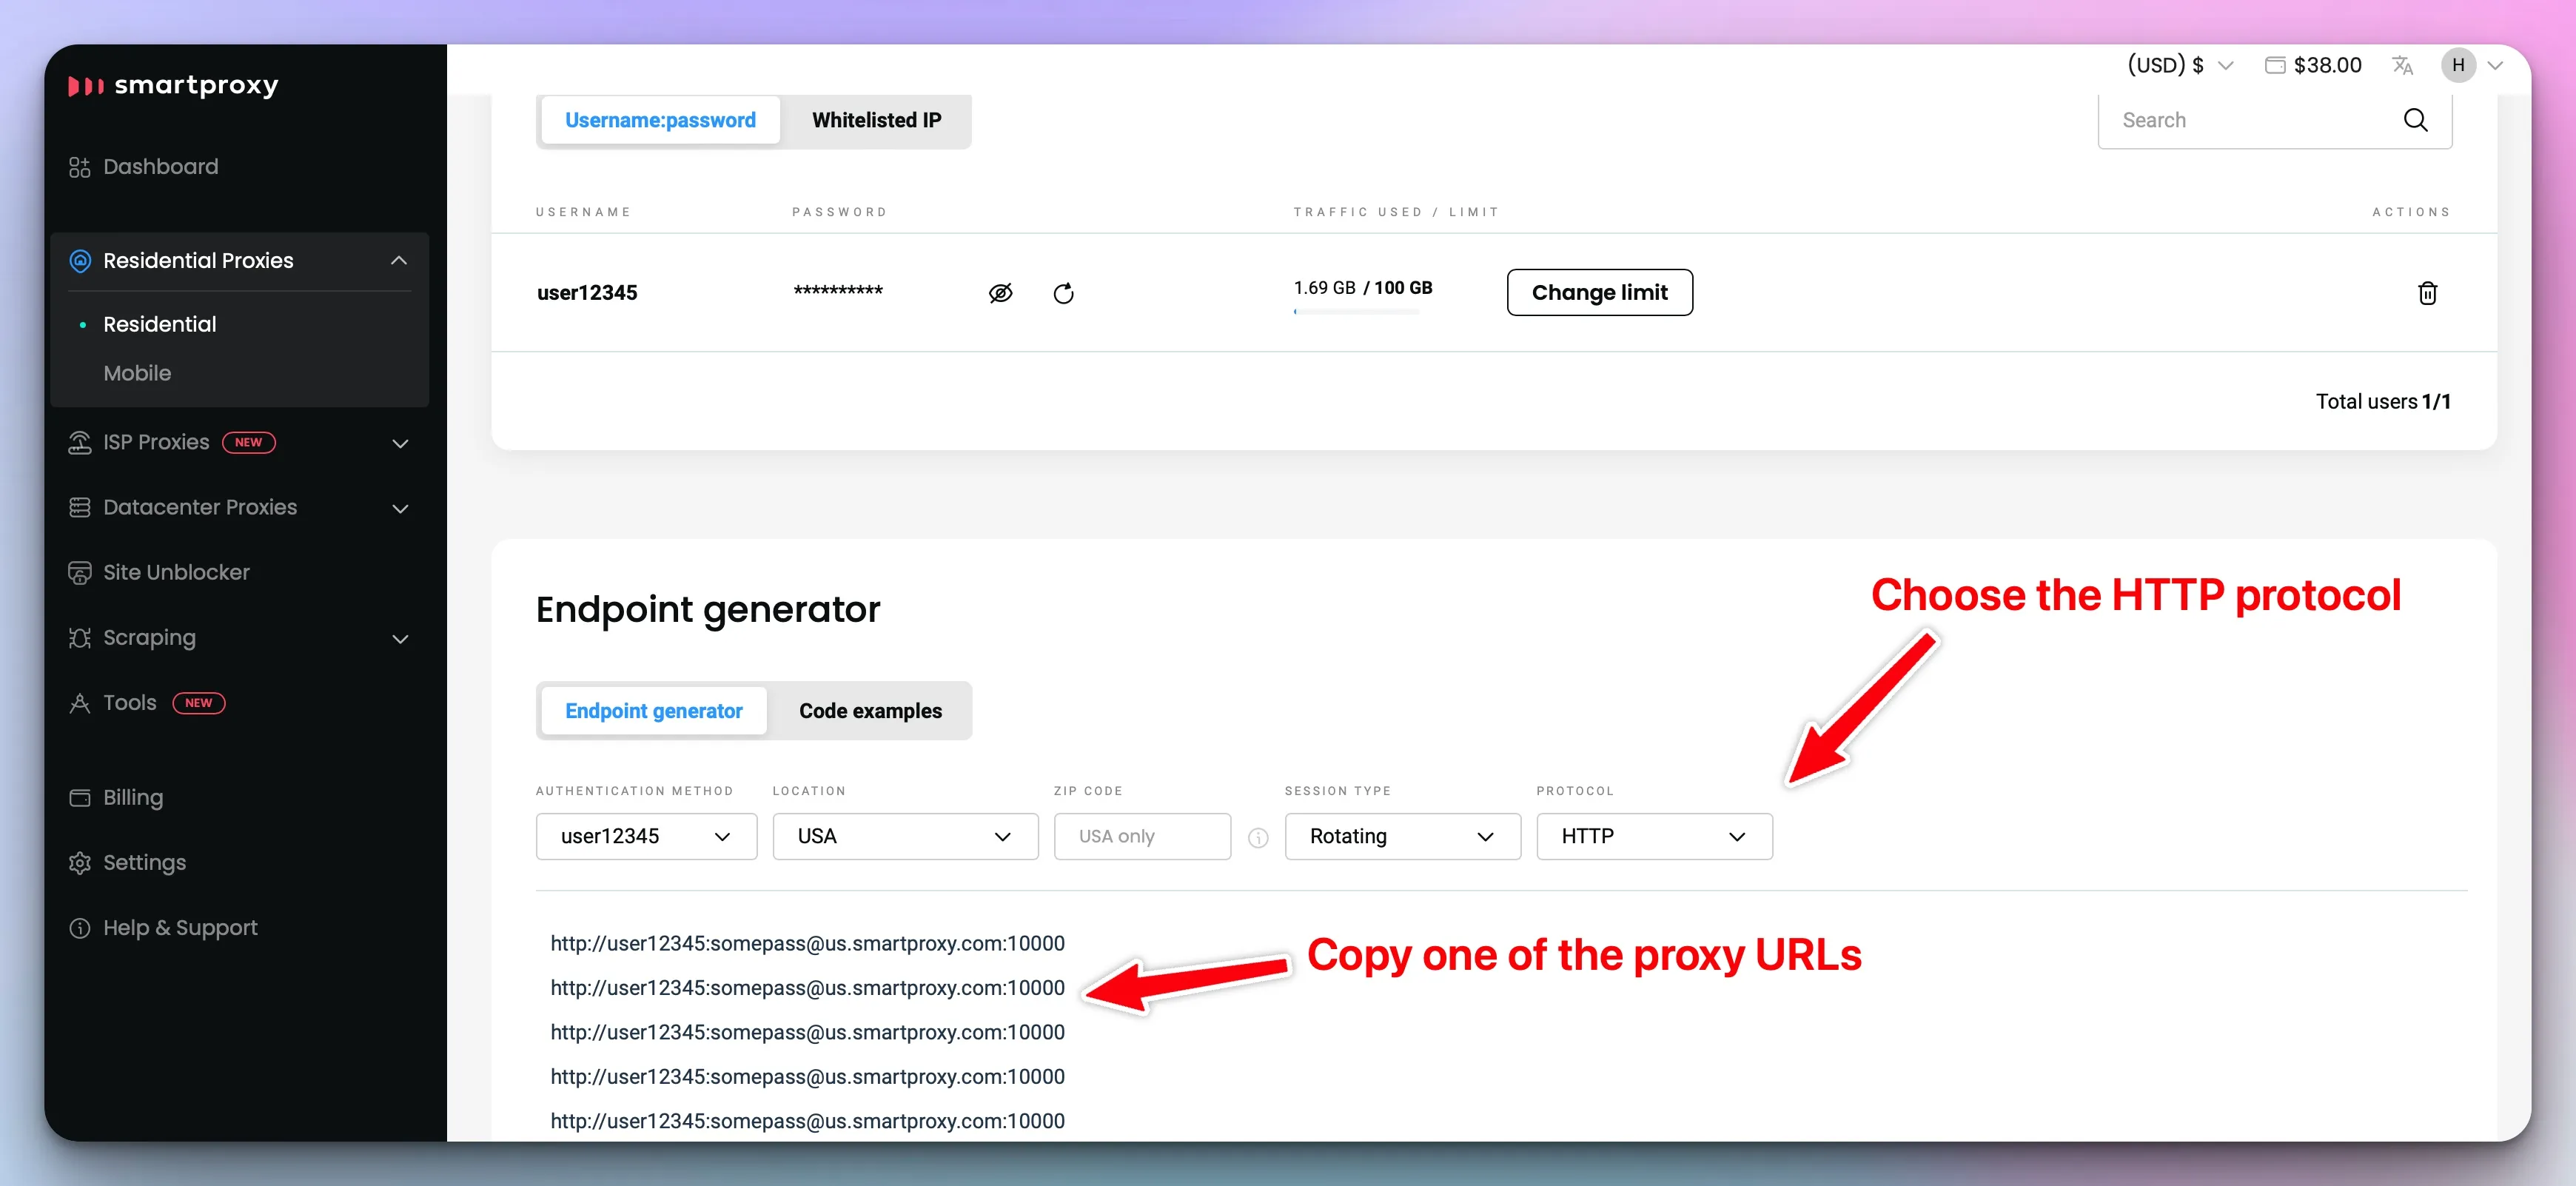
Choose pay-as-you-go residential proxies in Decodo or any other proxy provider you picked in the previous step.
And your goal is to copy the HTTP URL of the proxy with the desired configuration.
In the case of Decodo, it would look like:
 .
.
3. Use the proxy with the ScreenshotOne API
Once you have the HTTP proxy URL, not HTTPS, nor SOCKS5. You can specify it when sending an API request with the proxy parameter, just like this:
https://api.screenshotone.com/take?proxy=<your proxy url>&access_key=<your API key>&url=<the site you want to screenshot>Where <your proxy url> is your proxy URL, or in the case of our example is http://user12345:somepass@us.smartproxy.com:10000.
Recommendations
A few tips to improve your success rate when using proxies:
-
Consider using data center proxies first, as the cost is much lower than residential proxies. If they don’t work for you, only then switch to residential or even mobile proxies.
-
Don’t use random location proxies. Use proxies located in the United States or your specific location, rather than random locations. For most proxy providers, stability is unlikely when using random locations.
-
Don’t send many requests through the same proxy. If you plan to send many requests in parallel through the same proxy, consider using different ports if available or even different proxies. Using a single channel is highly likely to slow down your API requests, cause timeouts, and result in more errors.
-
If you encounter network issues, check the balance and reach out the proxy provider support, but we also noticed that for some providers, you sometimes need to recreate your proxy user/account to make it work again.
-
Retry with a proxy only when it is likely to help. A proxy can help with errors like
network_error, selectedhost_returned_errorstatuses, or known block-page markers, but it won’t fix invalid API parameters, missing permissions, bad selectors, storage errors, or quota limits. See the proxy retry guidance for the full list.
Reach out if anything
You see, it was that easy. In case if you have any questions or encounter any problems, please, don’t hesitate to reach out at support@screenshotone.com.