Upload to S3
You can use ScreenshotOne screenshot API to take website screenshots and upload them directly to Amazon S3 and any other S3-compatible storage like Cloudflare R2, Backblaze, and others.
I will guide through a few simple steps of how you can do it.
Today’s UI for Amazon AWS console or ScreenshotOne might be a bit different, and things can change after a while, but you should sense the overall approach from the post you need to apply to make it work.
If you are familiar with AWS, you can go straight away to configure access to S3 in ScreenshotOne.
Prepare the bucket and credentials
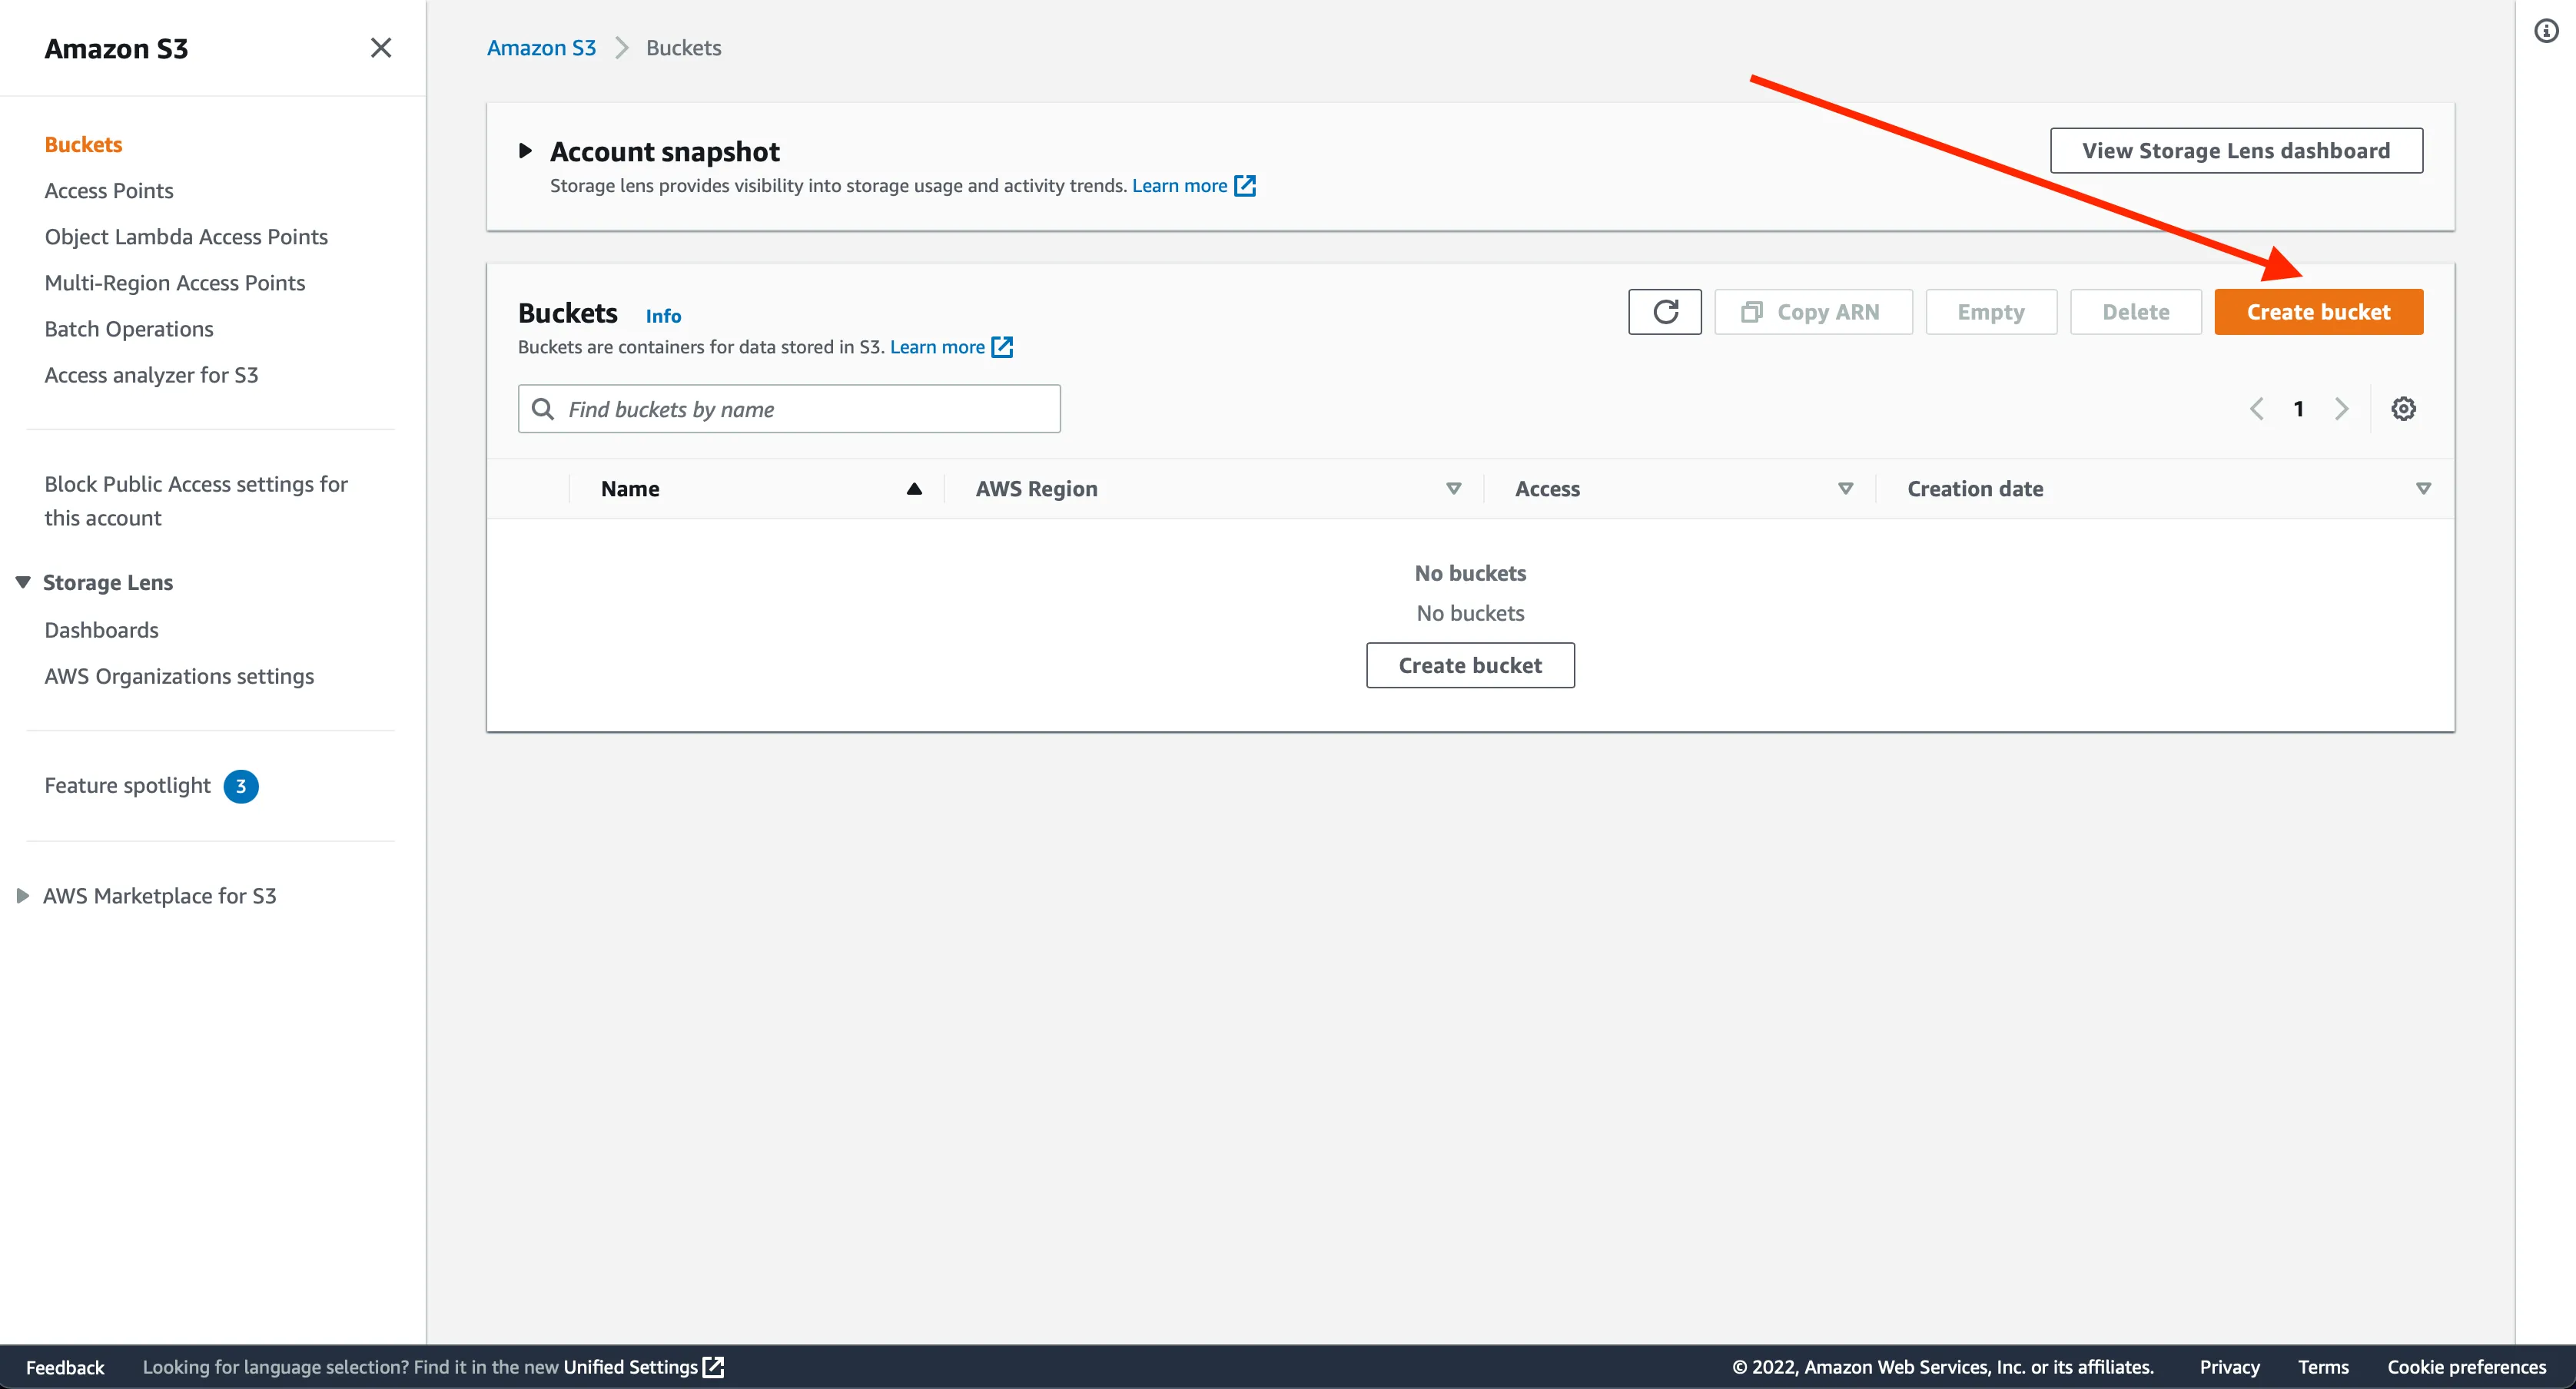
Open the S3 console and click on the “Create bucket” button:
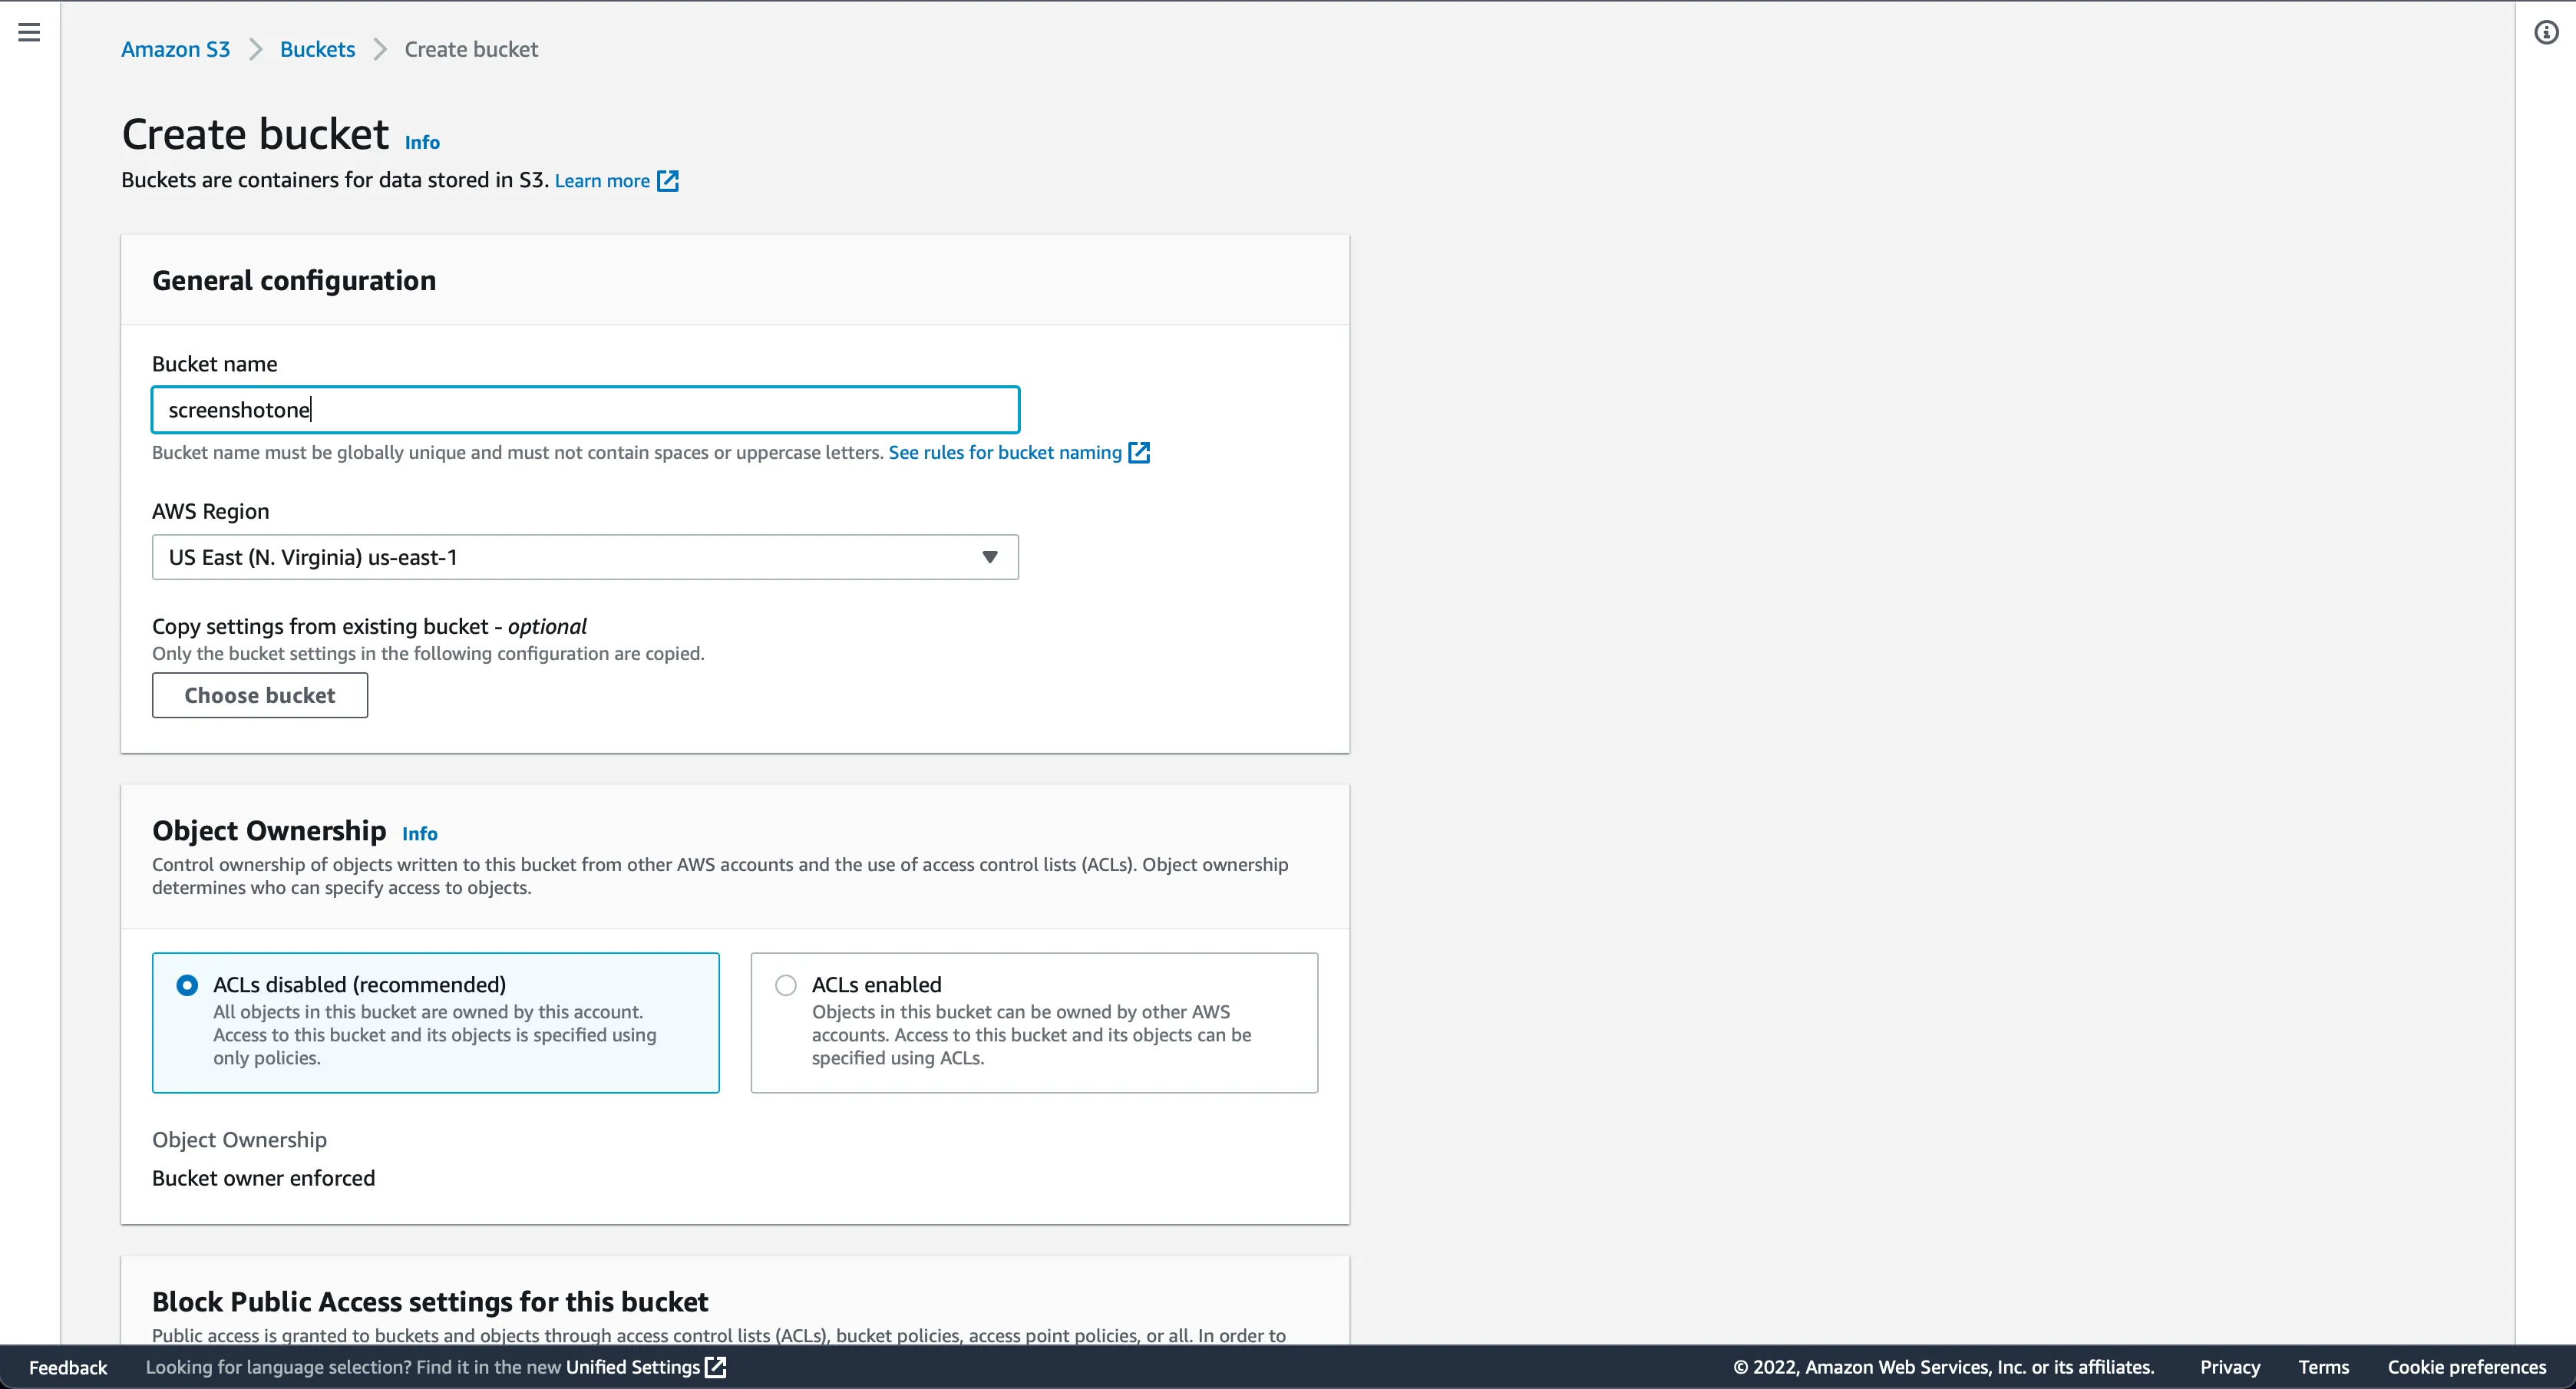
Type the bucket name, choose a region, and other important for you settings:
Now, let’s create access keys to upload to the S3 bucket.
AWS Identity and Access Management (IAM) user is an entity that you create in AWS to represent the person or application that uses it to interact with AWS. A user in AWS consists of a name and credentials.
Before creating a user, we will create a narrow policy to restrict access to the bucket we created and only for putting objects into it.
You manage access in AWS by creating policies and attaching them to IAM identities (users, groups of users, or roles) or AWS resources. A policy is an object in AWS that, when associated with an identity or resource, defines their permissions. AWS evaluates these policies when an IAM principal (user or role) makes a request. Permissions in the policies determine whether the request is allowed or denied.
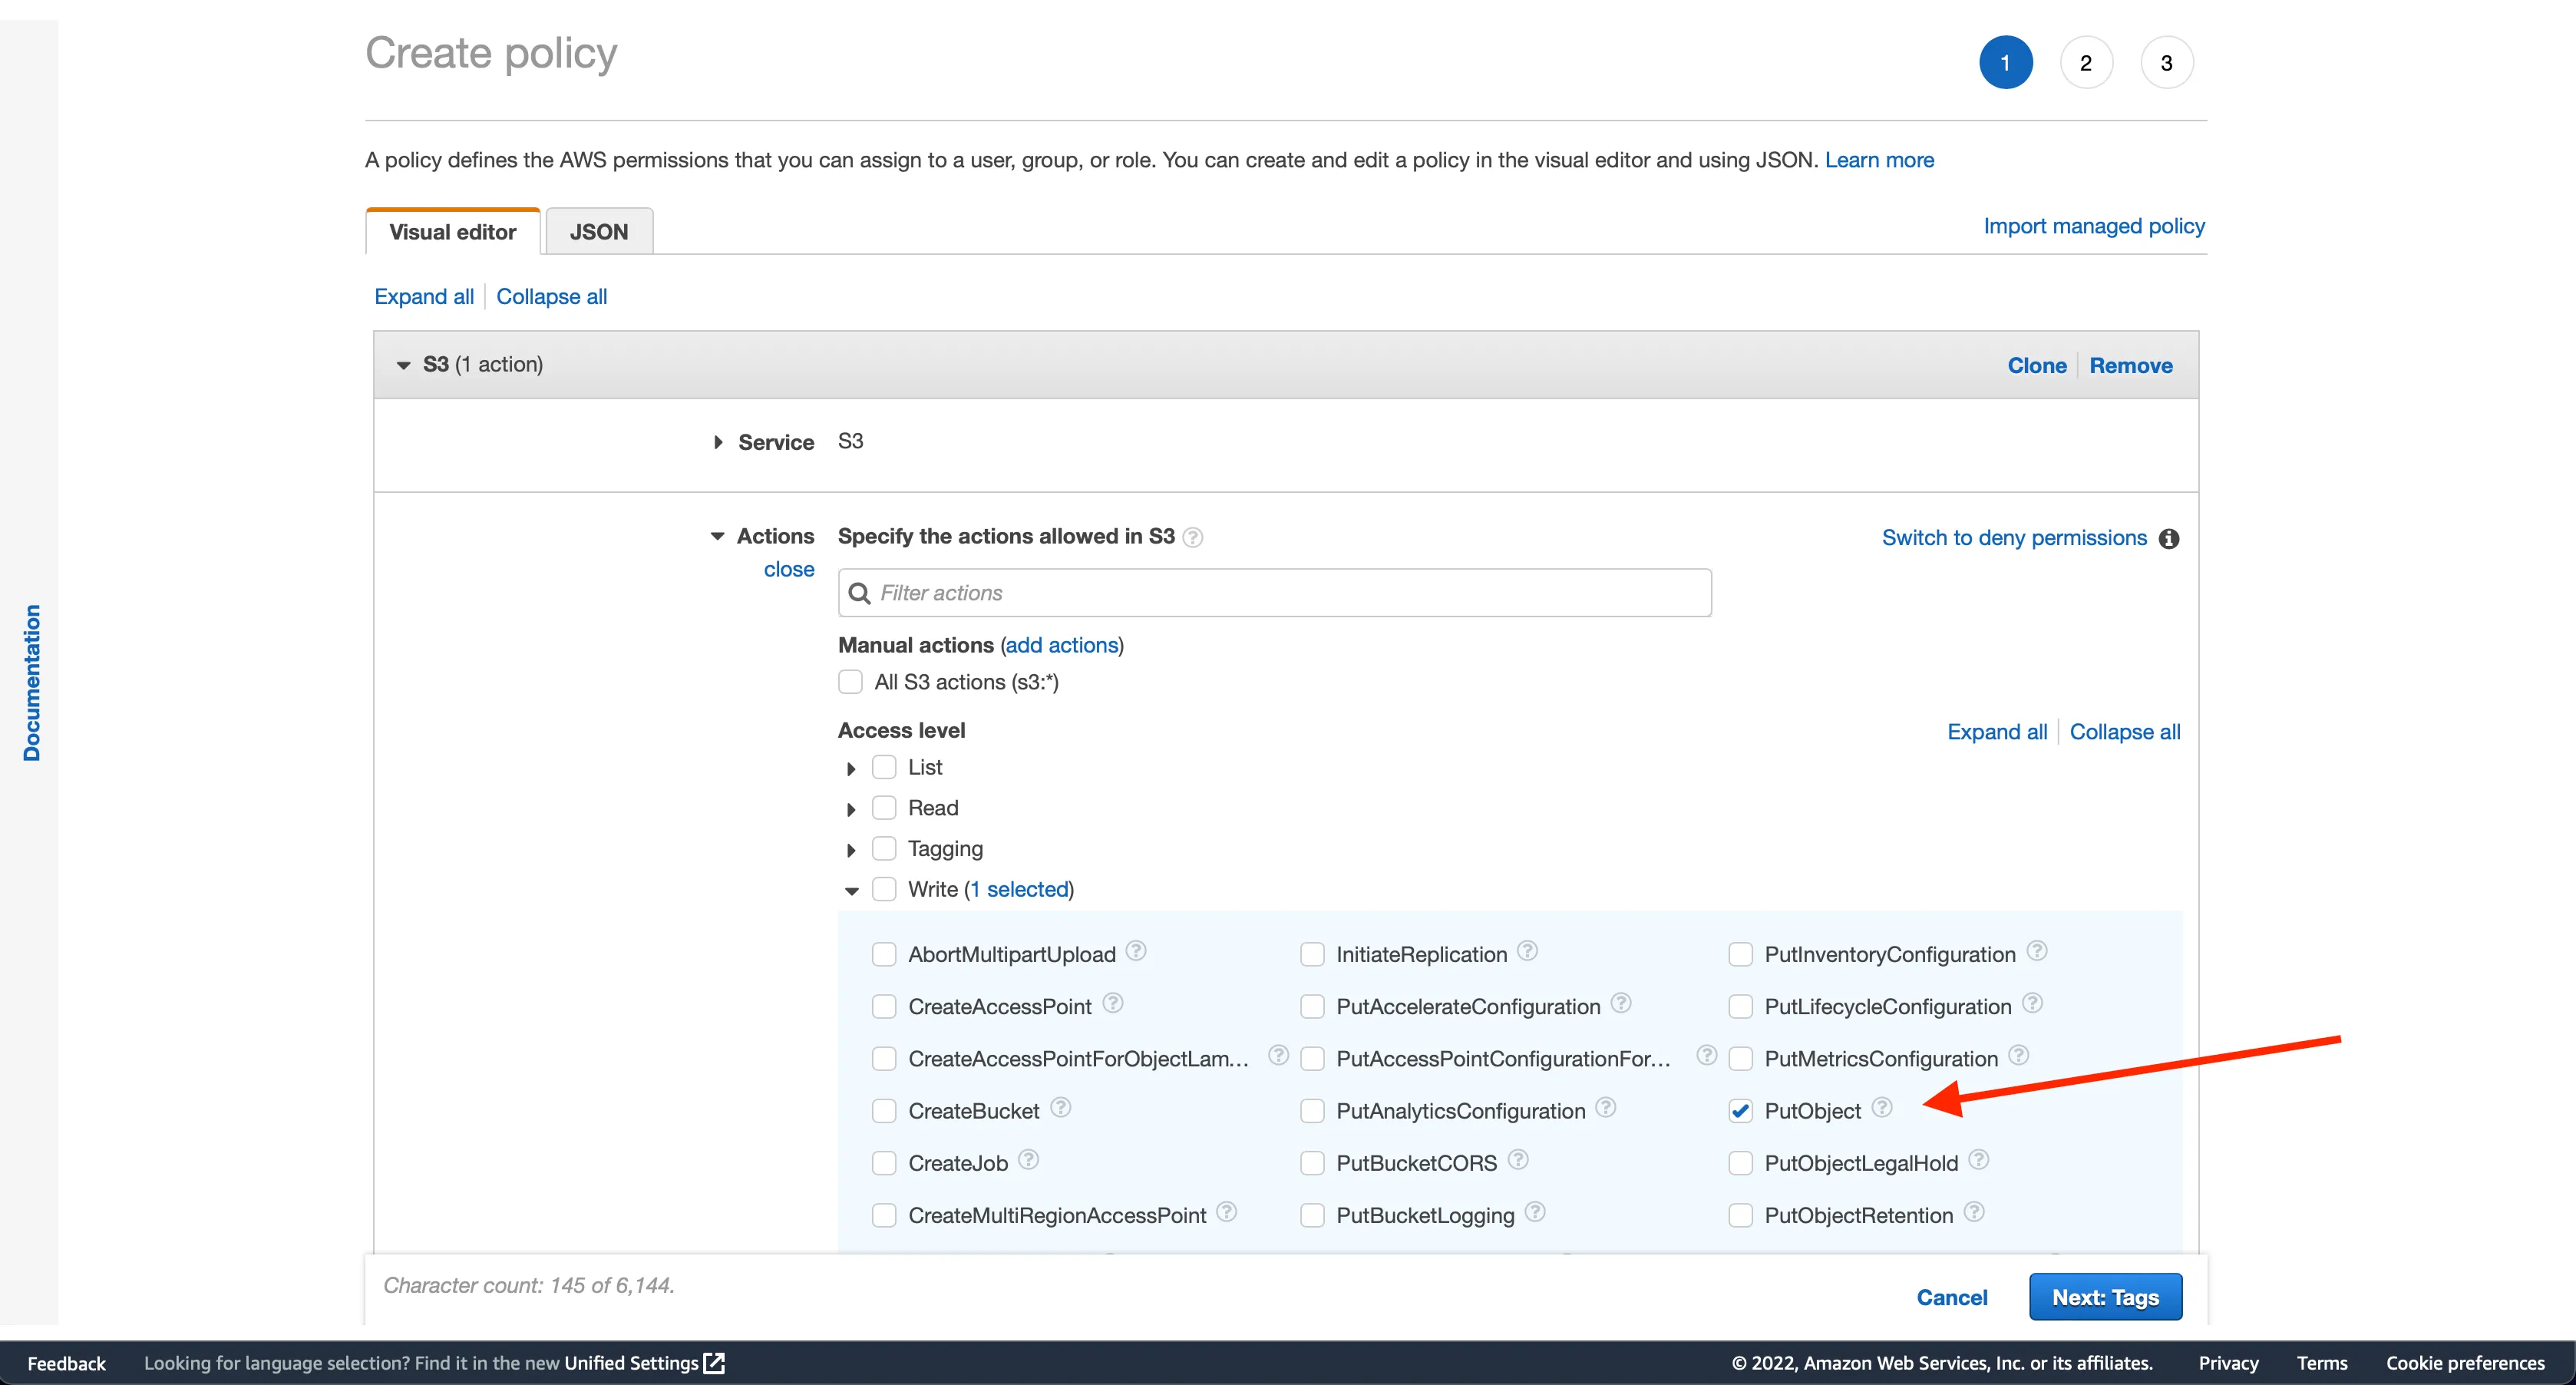
Open the IAM management console, navigate to “Policies”, then click on the “Create policy” button. And one the following screen, select S3 as a service, then allow only PutObject operation for the bucket with the name screenshotone:
After clicking on the “Create policy” button and entering the policy name:
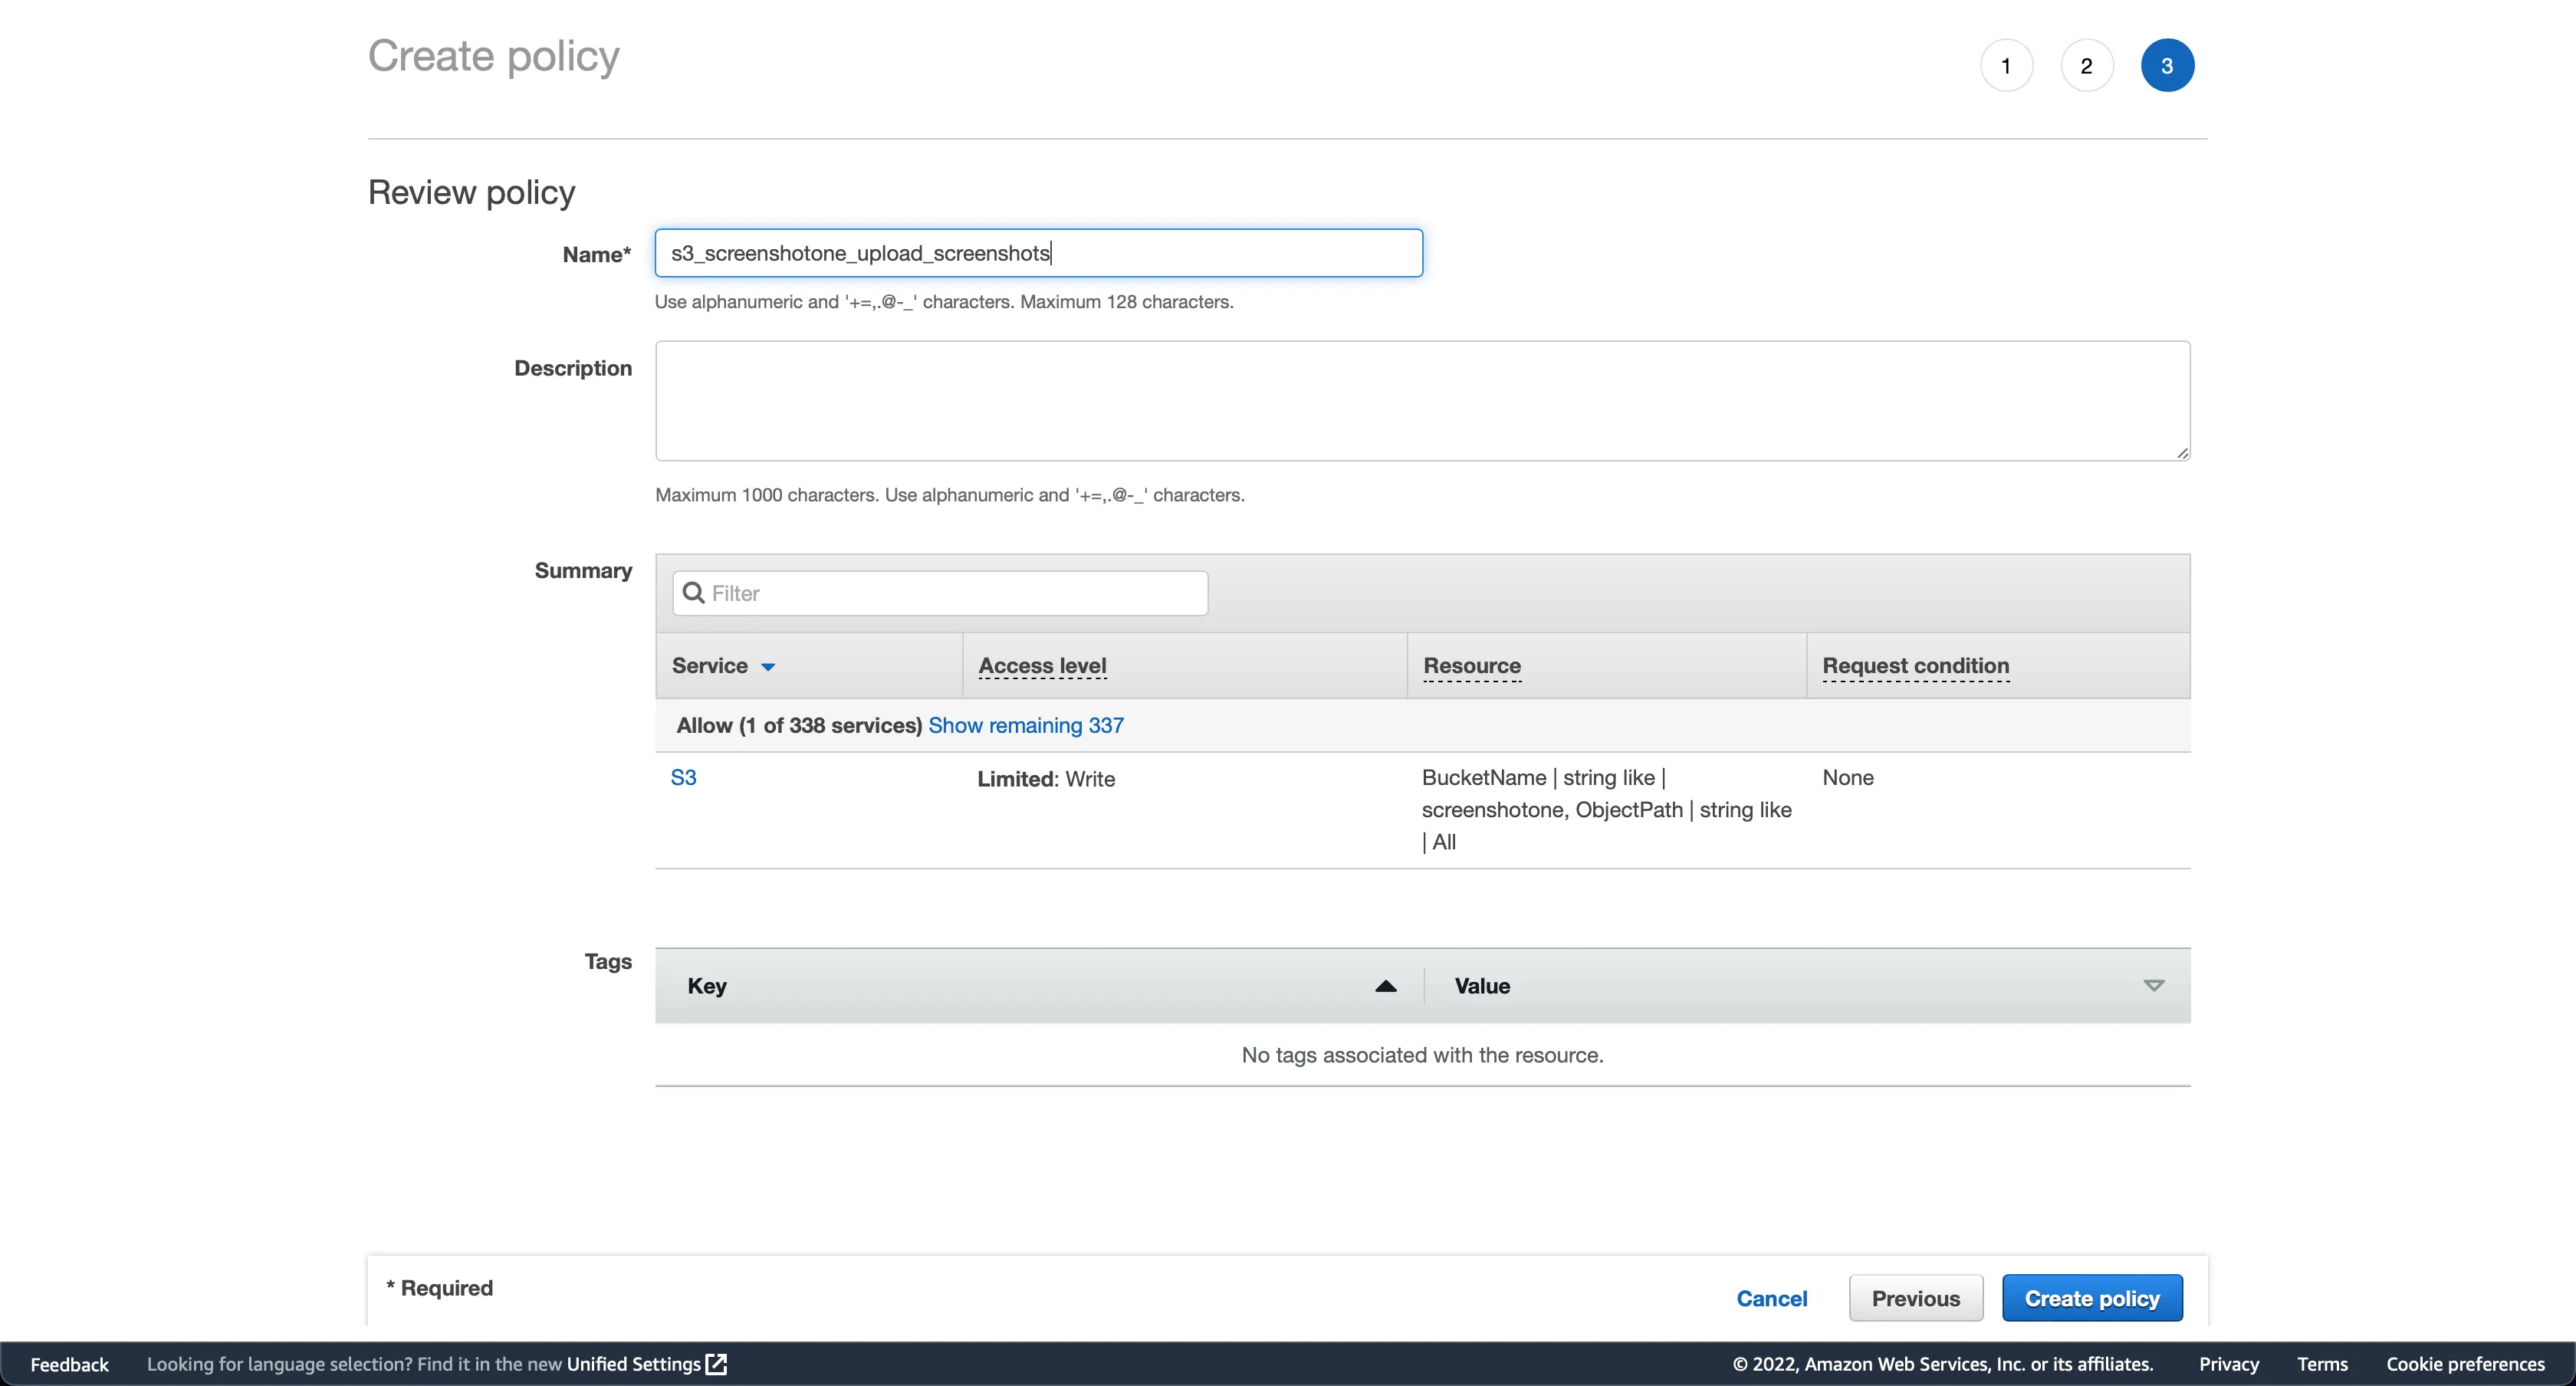
I gave a clear name to the policy as an example. You can provide whatever you like.
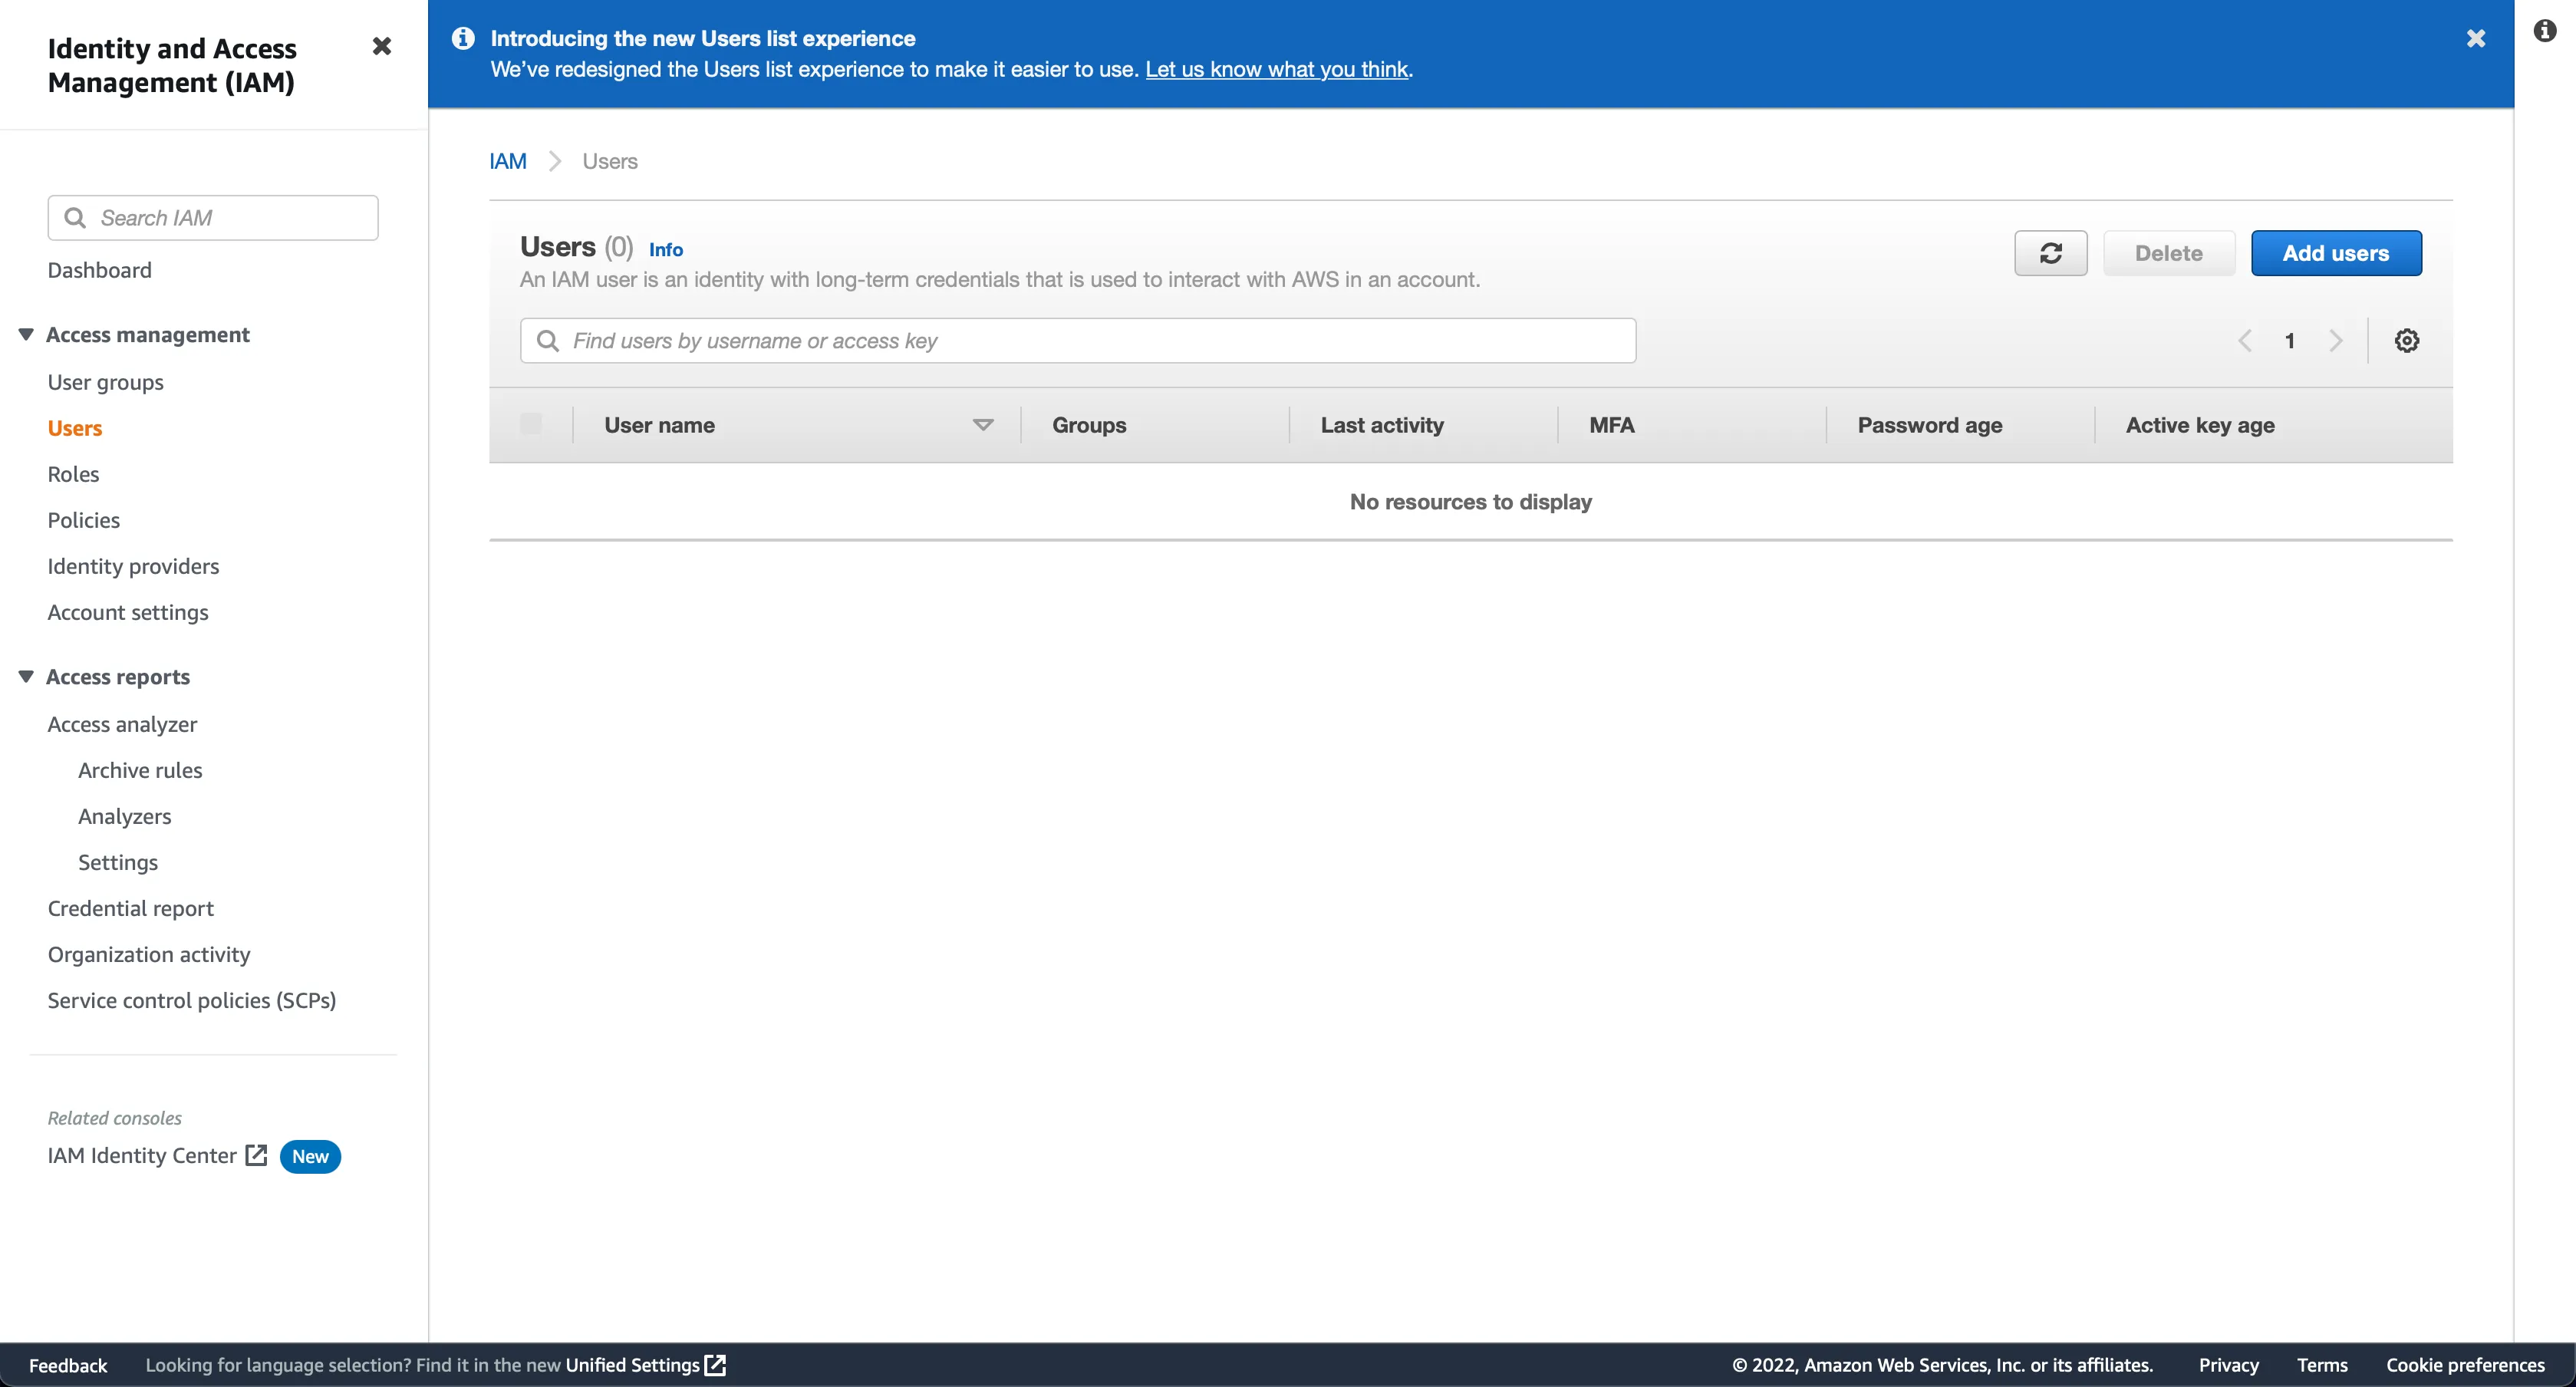
Then open the IAM management console again and navigate to users. Once you are here, click on the “Add users” button:
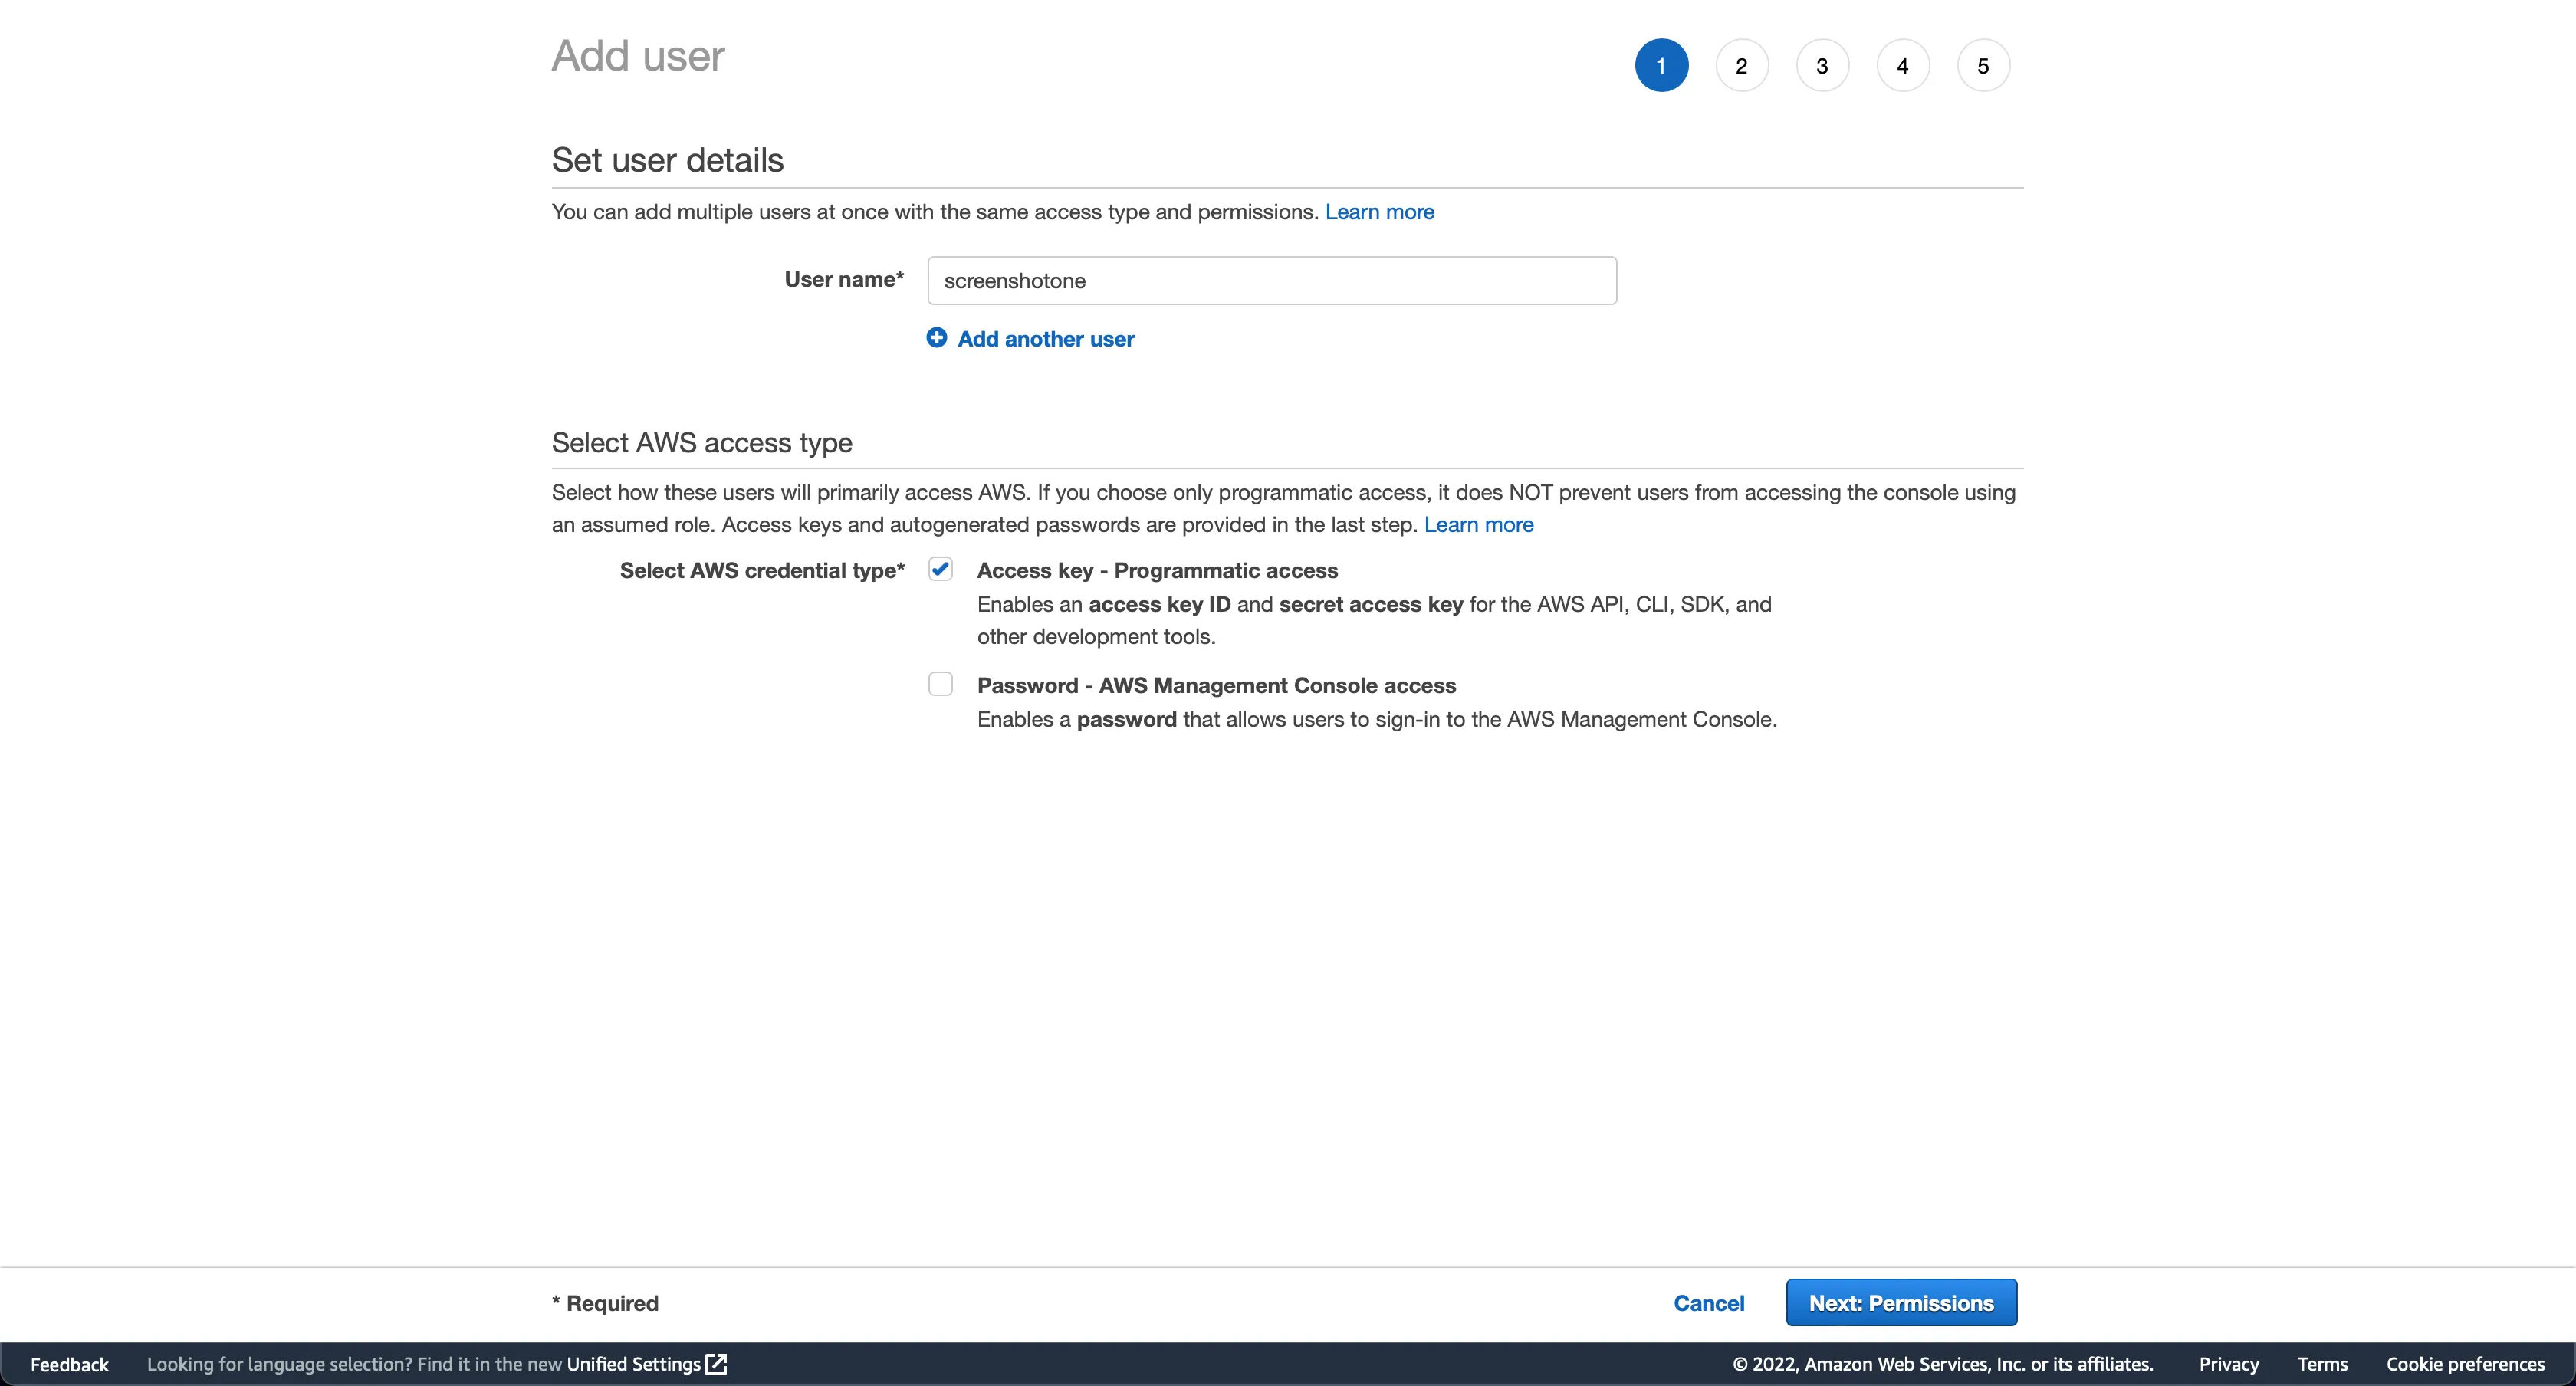
After that, type username and select “Access key - Programmatic access”:
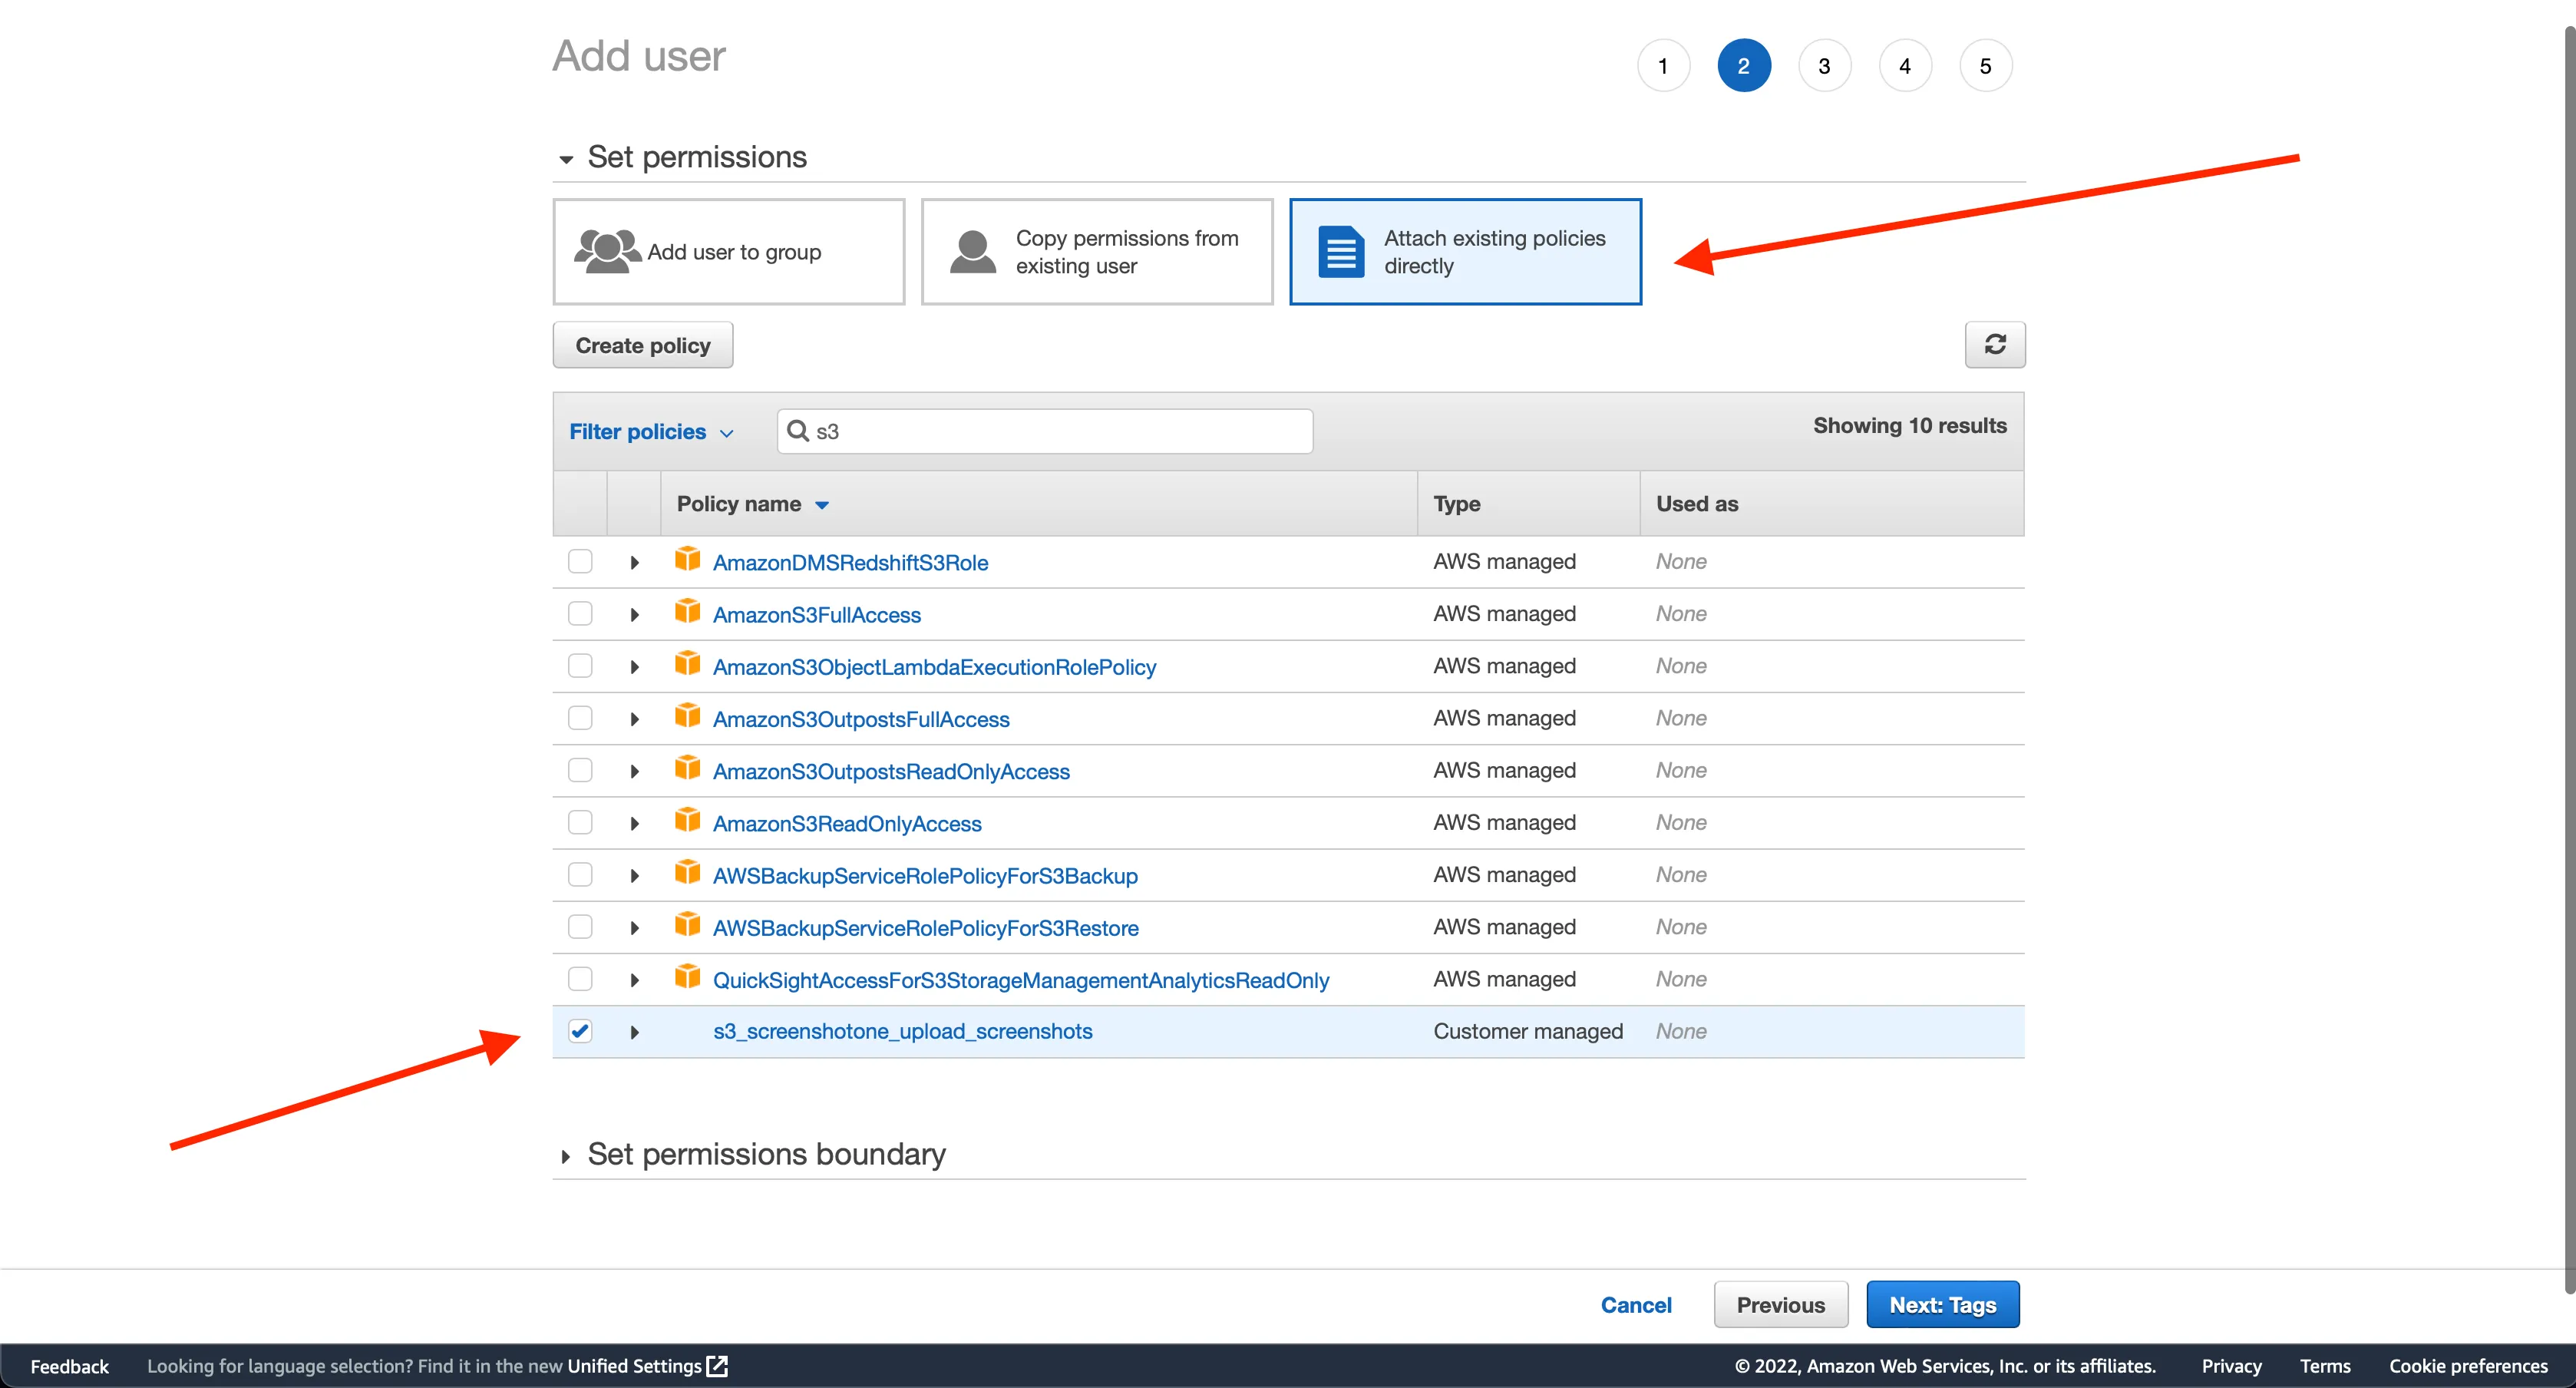
We need to select and attach the policy we created earlier to the user:
The user is primarily ready, so we can skip the following steps and get to the end, where we can see credentials:
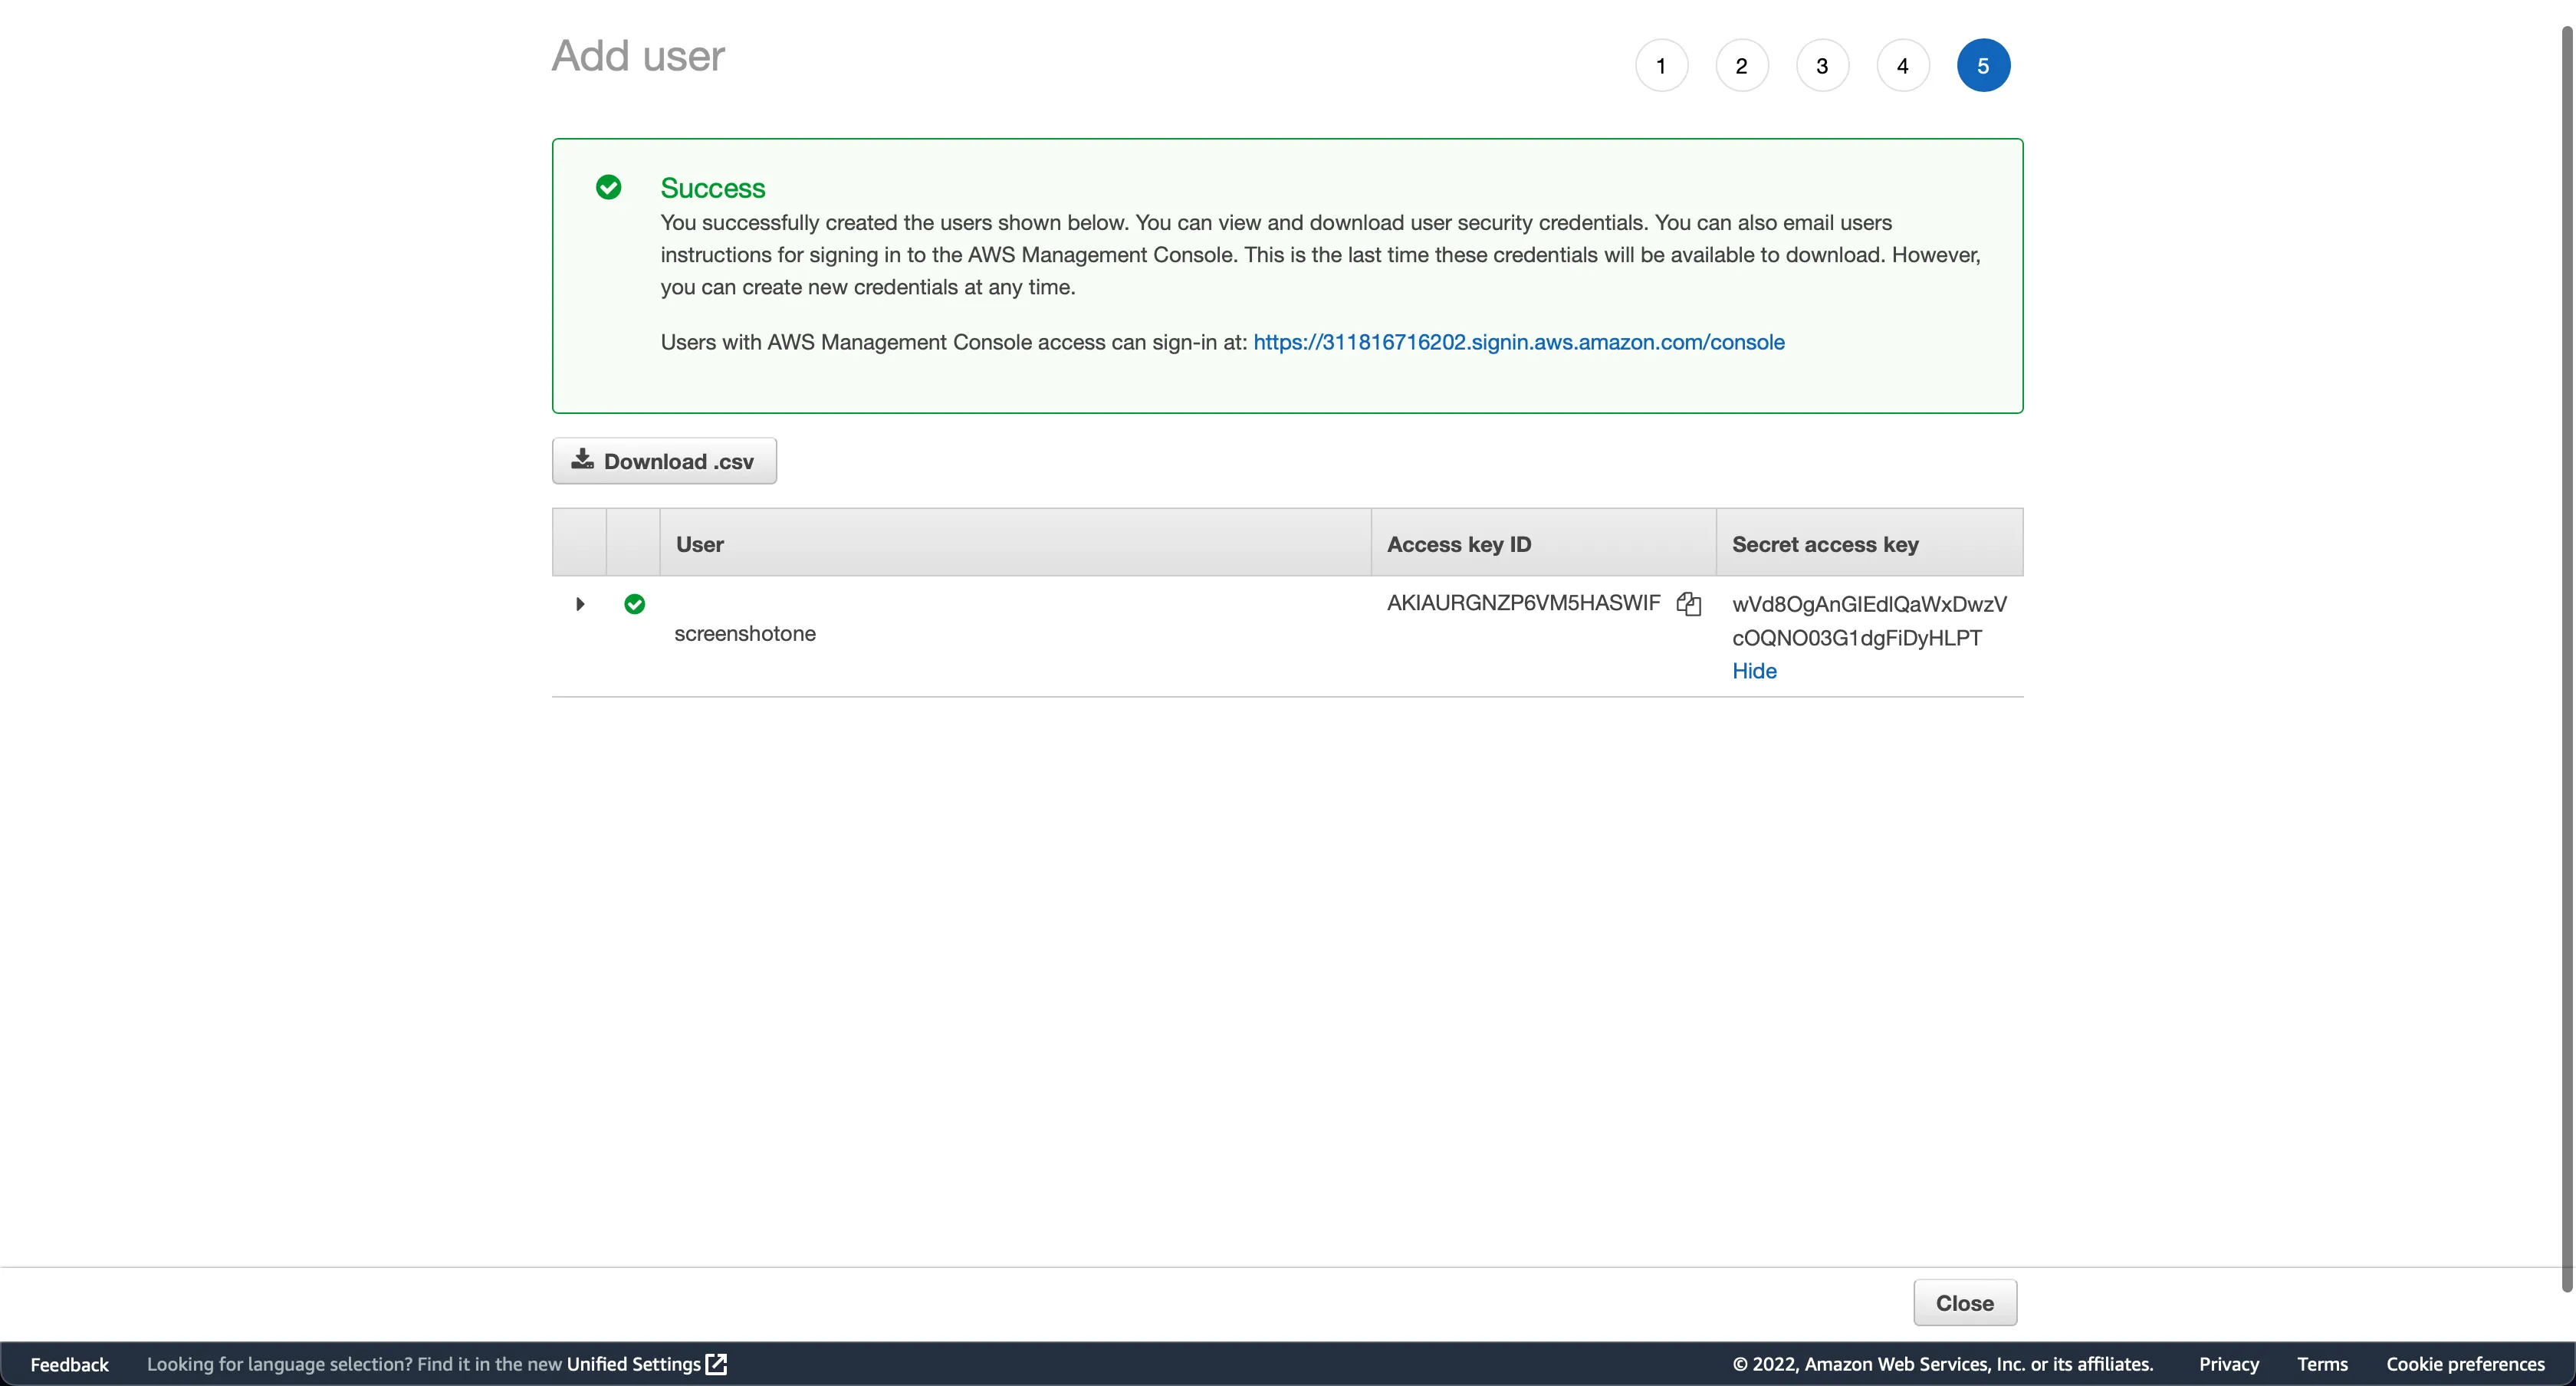
Copy the credentials and store them in safe place like password manager. We will need them in the next step to configure ScreenshotOne to upload screenshots.
I will save the credentials for our example to use in the next section:
Access key ID: AKIAURGNZP6VM5HASWIFSecret access key: wVd8OgAnGIEdlQaWxDwzVcOQNO03G1dgFiDyHLPTConfigure access to S3 in ScreenshotOne
You can set credentials (Access Key ID and Secret Access Key) when sending an API request or you cat to go to the access page. And put all the credentials you got from Amazon AWS for S3 into the “S3 access” configuration form:
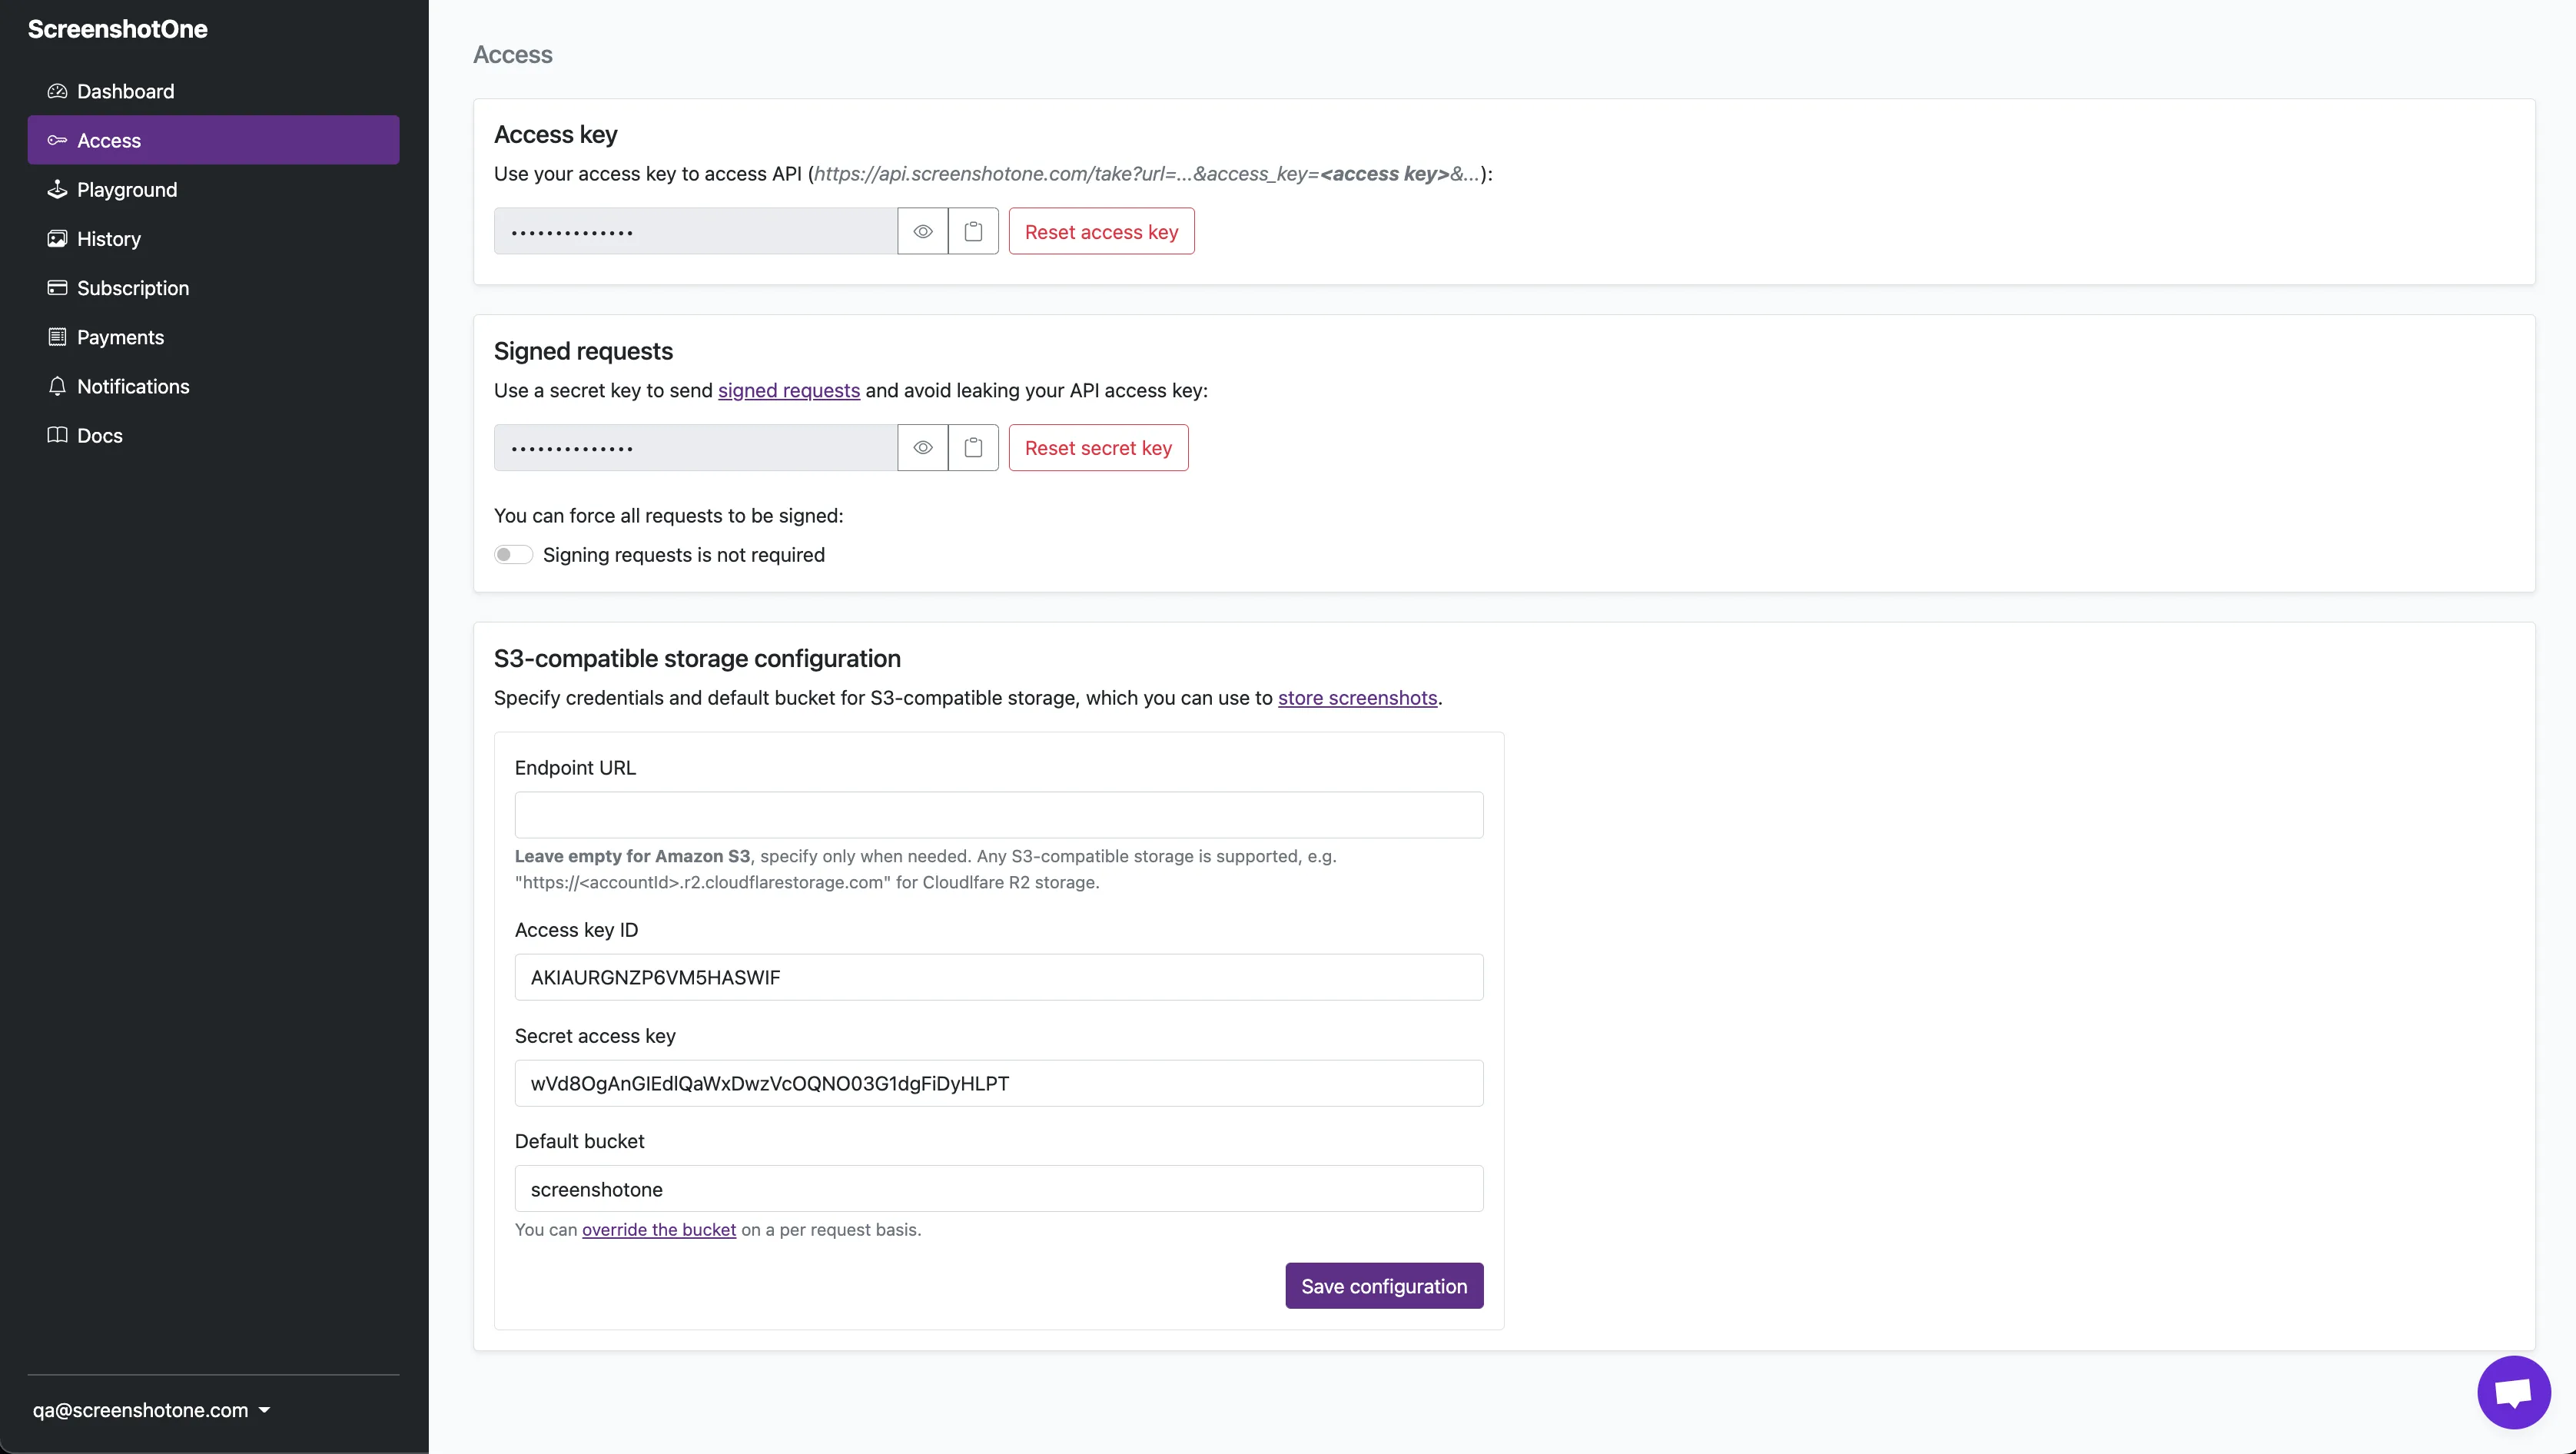
I specified the default bucket, but you can use many buckets to upload screenshots and then override the target bucket with the storage_bucket option when using API. But for example, I use only one bucket—it is enough.
Take a website screenshot through API with storing options
ScreenshotOne API has a bunch of options related to uploading screenshots to S3 storage:
- store triggers upload of the taken screenshot, rendered HTML or PDF to the configured S3 bucket.
- storage_path—specifies the key for the file, but not an extension. The extension will be added automatically based on the specified format.
- storage_bucket—overrides the default bucket configured in the access page.
- storage_class—allows to specify the object storage class.
Let’s take a screenshot and upload it to S3:
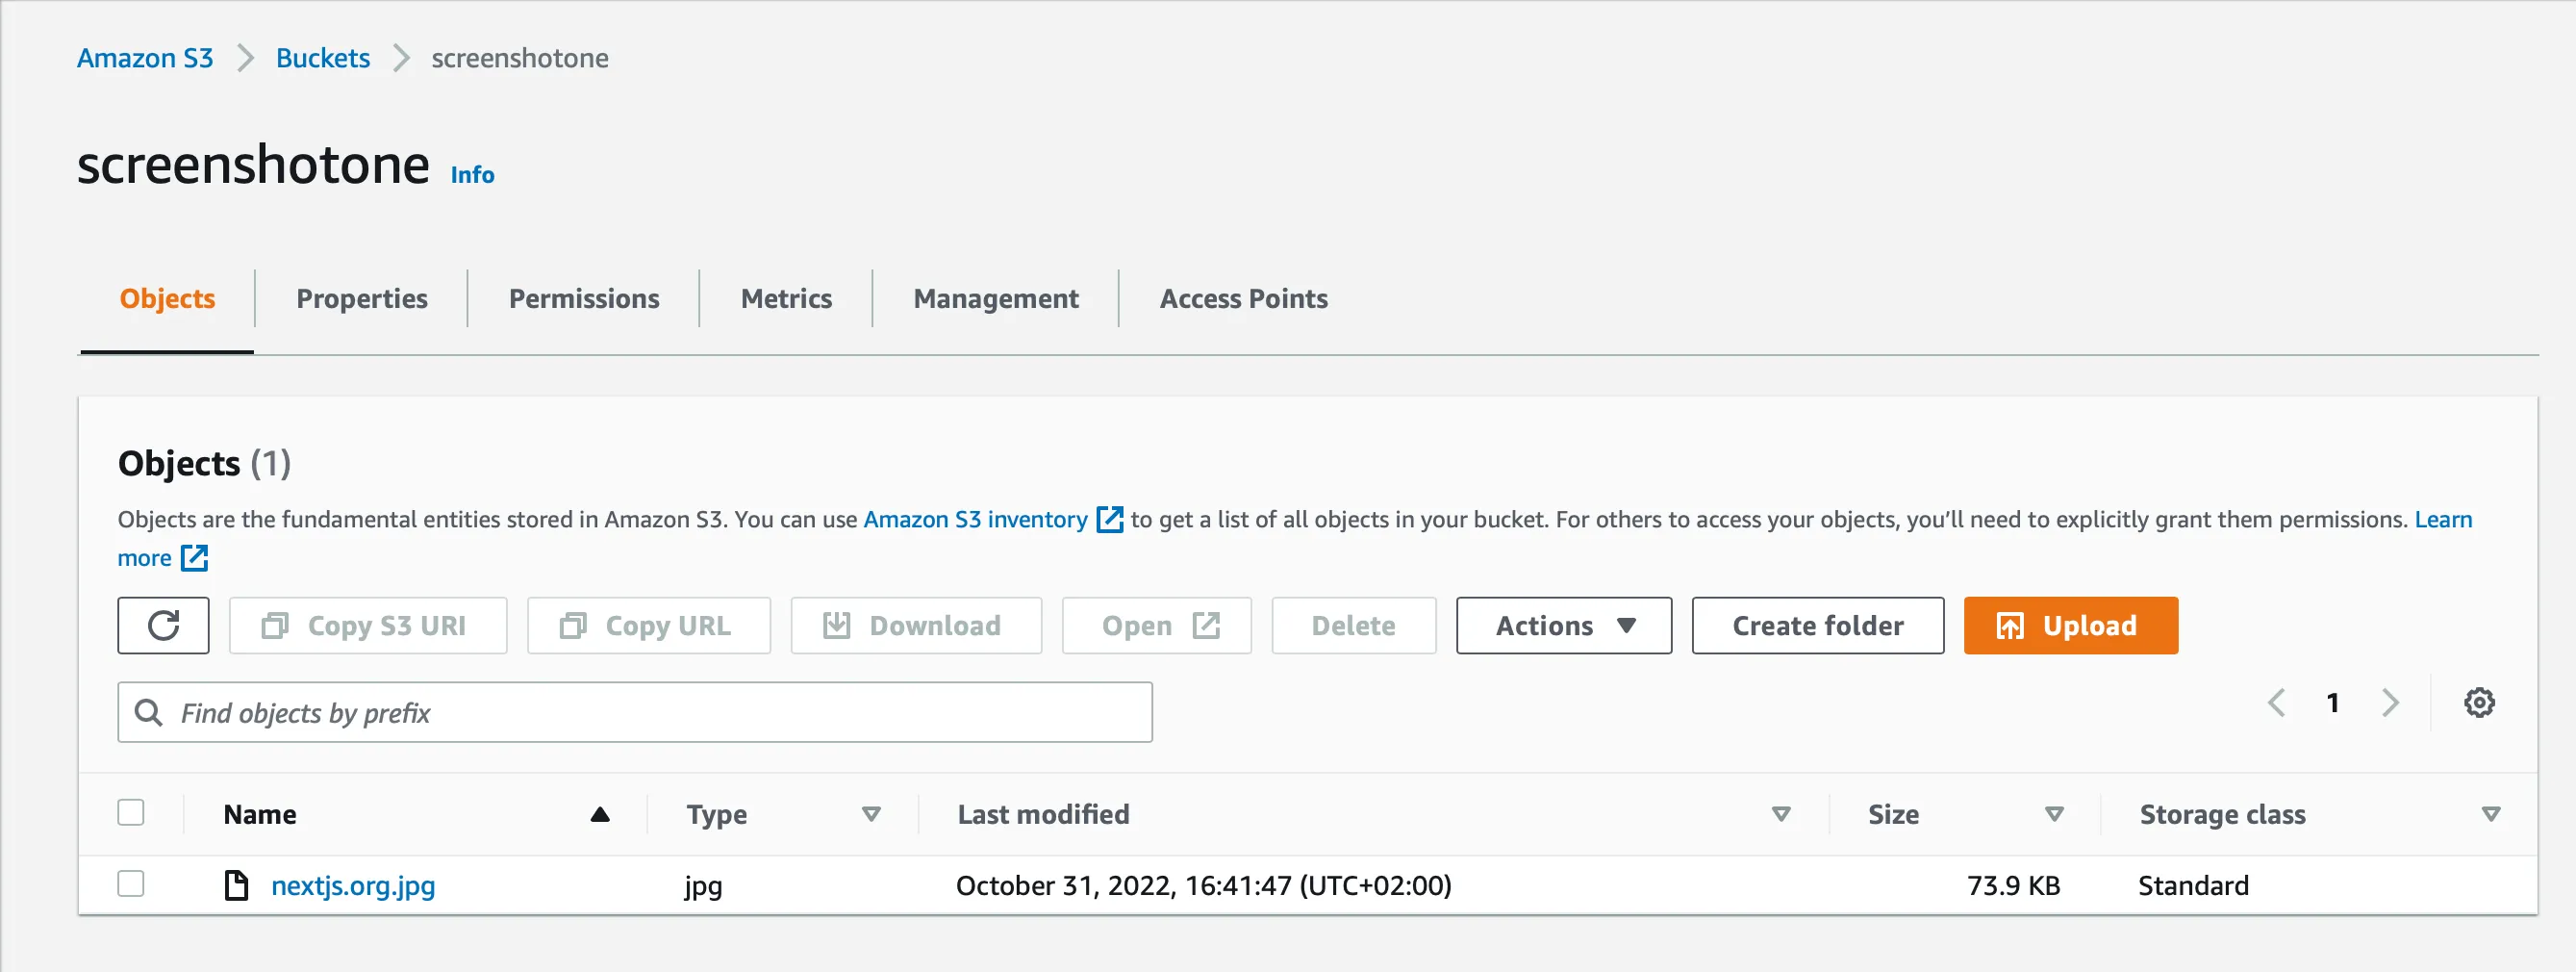
https://api.screenshotone.com/take?access_key=0MpjJxw8Vk7ZAw&url=https://nextjs.org&store=true&storage_path=nextjs.orgThe result is:

And let’s check S3:
In case you don’t need to return the resulting image and speed up uploading, add response_type=empty to the request:
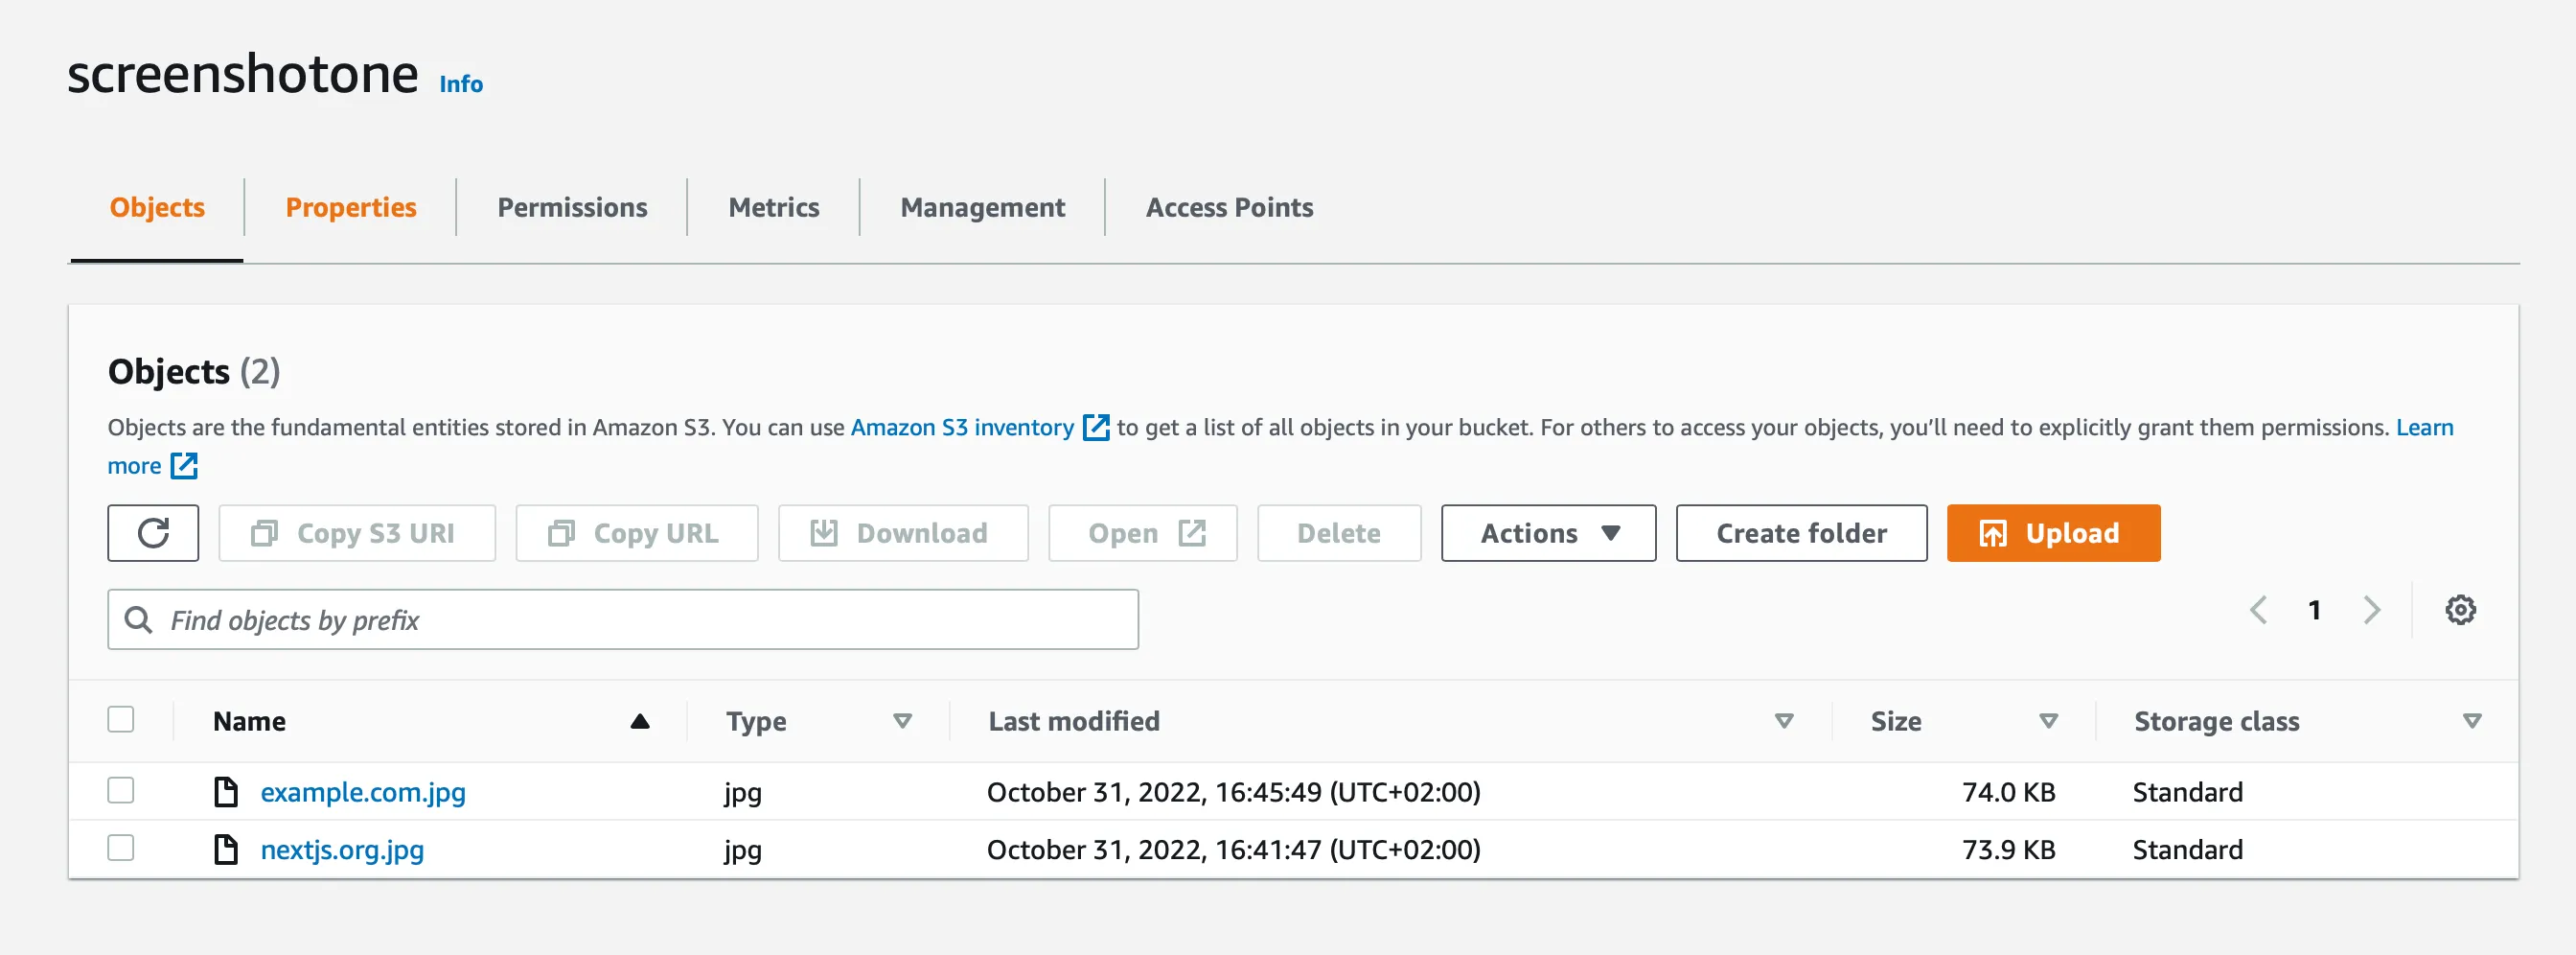
https://api.screenshotone.com/take?access_key=0MpjJxw8Vk7ZAw&url=https://example.com&store=true&storage_path=example.com&response_type=emptyThe result is a white screen—zero bytes sent from the ScrenshotOne API in response. And let’s again check that the screenshot is uploaded:
That’s it. But if you want to do it asynchronously?
Async and Webhooks
ScreenshotOne supports asynchronous screenshot rendering and webhooks. You can upload your screenshots to S3 asynchronously without waiting and then receive the resulting upload URL to your server.
To do that, specify additional parameters async, webhook_url, storage_return_location. And only JSON response type is supported.
So the full request might look like:
https://api.screenshotone.com/take?access_key=0MpjJxw8Vk7ZAw&url=https://example.com&store=true&storage_path=example.com&response_type=json&async=true&webhook_url=https://example.com&storage_return_location=trueRead more about asynchronous screenshot rendering and webhooks.
Why upload to S3
I don’t know your use case and would be happy to know it, but there are a few reasons why customers of ScreenshotOne upload website screenshots to S3.
One is to use CDN that pulls images from S3 storage, and the other is to archive screenshots, process them later, or even compare them.
Instead of summary
It makes me happy to help people solve their problems. And even happier when people pay for that. I hope today I solved yours. Have a good day or even night, and be happy 👌